I received an invite to play in a game organised for the weekend just gone. John had set up a Beach assault onto prepared German positions, where Allied forces - British and US would assault the beach from landing craft, proceed inland and secure their objectives. I had seen pictures of the Battlegroup Overlord beach terrain at the Guild page, which looked truly awesome to assault. When I arrived at 10am, and John lead us in to the games room, I was similarly impressed. This had taken a lot of time and effort to paint, assemble and bring all together for this game.
 Beach opposite the British landing beach. Ian was playing the British, with Dave commanding the German troops in the town.
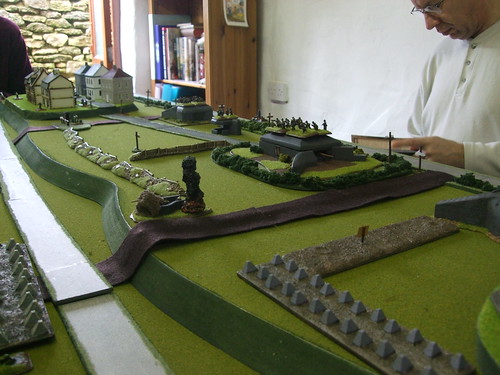
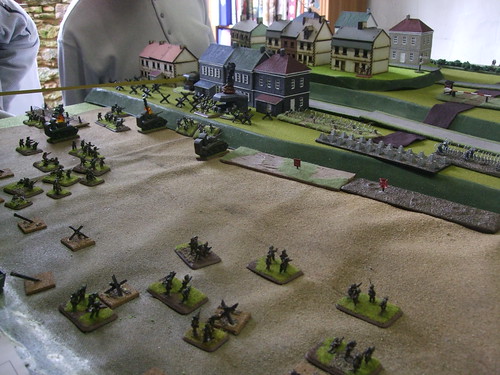
 The beach opposite the US landing ground. I played the US, with Steve playing the Germans in the Coastal Defence Battery. There was an area between the town and battery that was allocated as forward positions for the Germans. These were unoccupied at the start. All the bunkers were occupied, with Pak38, except the 2 bunkers at the rear covering the road had Pak43. There were a number of Tobruk's containing HMG's and 2 pedestal mounted quick firing 50mm. Access to the bunkers was by invitation only - RSVP, otherwise you had to storm the front or rear. There were no weapons on the board that could penetrate any of the bunkers. The US did have some flamethrowers that could 'pin' a bunker, but this pin would be removed the next turn. I don't know what the British had, as I was getting really focused on the US side of the table.
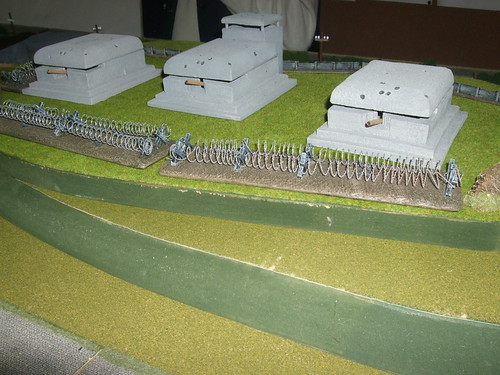
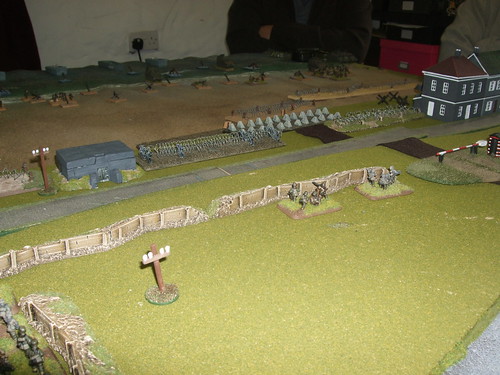
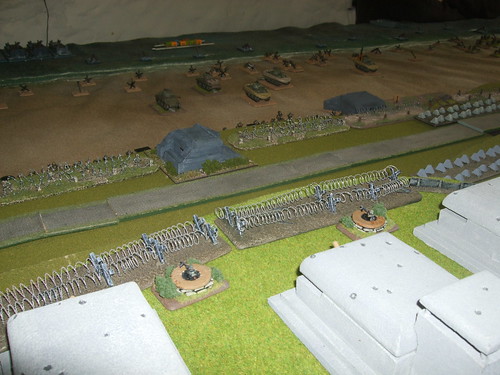
 View of the town on the Allied left. Shows 2 bunkers, and a minefield with a barbed wire entanglement behind. Also included are some stands of French civilians - the usual suspects you would find in a French town about to be liberated - Nuns with guns!! These were sent by Battlefront to John due to an error/delay in an order he had sent in, by way of compensation/sorry. Very kind of them to do this.
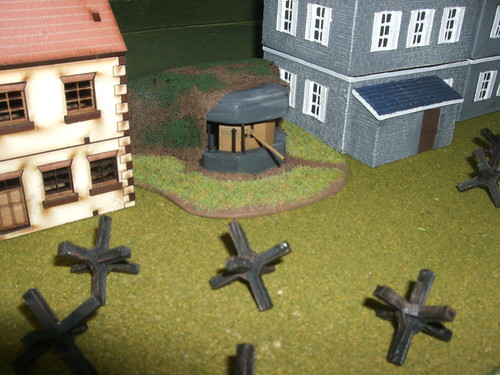
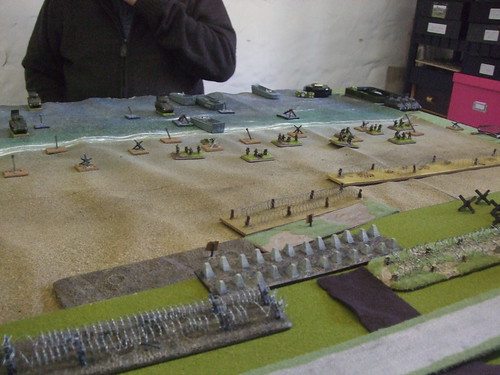
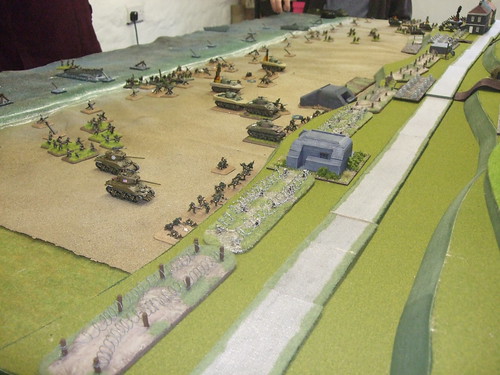
The tank traps would provide cover for infantry, and obviously provide a barrier to any vehicle movement. Again, affecting the game would be the seawall from the beach, which was to provide cover for the infantry, but impassable for the tanks/vehicles. The seawall stretched across the table, but was cut at 2 places by roads, the only exit off the beach for the tanks. These were blocked by mines, wire and 2 concrete bunkers.
 Another shot of the town, showing one of the civilian stands. Actually 2 ladies of negotiable virtue, assessing the new business opportunity about to present itself after 4 years. The photo also shows the buildings - the white and green building is a hardboard laser cut model. Apart from being a fantastic bit of kit, clean detailed and convincing, I don't really know much more about it except that I believe that its a Battlefront product.
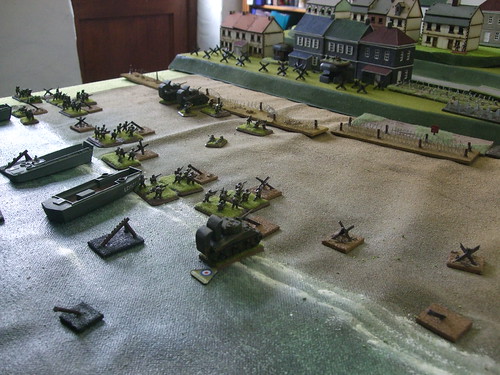
 View out to the beach from the German side, taken from the middle of the German positions. In the middle right hand side are German troops, with 2 of the Tobruk HMG positions, with the Allied landing craft at the far edge and some of the wading Shermans and DD Shermans. Basically we could land any of the infantry in any of the landing craft, but only 2 tanks could get into the LCT. Also, peculiar to the US troops would be their pioneer status that allowed them to take on the wire entanglements and minefields. The British would have to deploy Royal Engineers - and land them - to tackle their side of the beach.
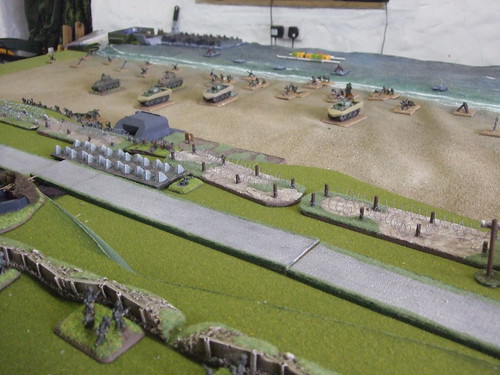
 View out to the British beach. The checkpoint was being cased by the Nuns with guns
 A shot of some of the civilians, and showing one of the resin houses.All the buildings had detachable roofs and floors allowing troops to deploy in them. Standard Flames of war.
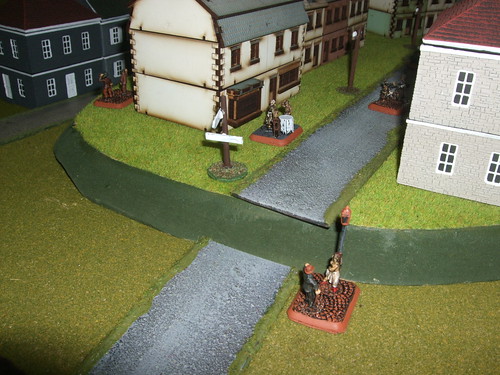 View from the other end of the street. Time for a Pernod before the invasion.
 View of the rear of the Coastal battery, but also showing one of the Pak43 bunkers defending the road exit off the beach. Also, the communication road running along the beach allowing movement by the Germans from left to right etc, for reinforcements.
 The front of the battery showing the defensive positions.
 One of the quick firing pedestal mounted 50mm guns. This would prove to be a crucial piece as the game proceeded. It's located between the battery and the town covering the centre of the beach and the road exits off the beach.
 The second quick firing 50mm, located in the middle of the town facing the beach, and the British landing zone.
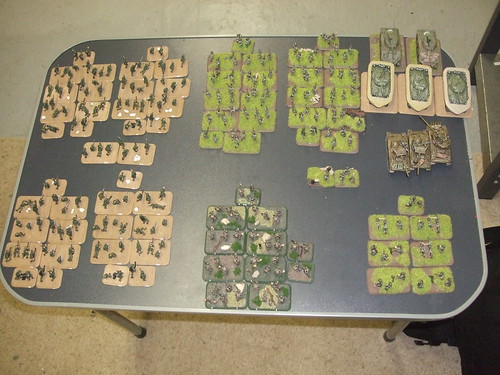 The US forces, comprising 2 companies of 4 and of 3 platoons, a heavy weapons platoon, 5 DD Shermans and 3 standard Shermans. For the game all motivation rolls would be done up to platoon level. No company motivation would be done, it was the Invasion after all. All the US forces were Trained and Confident.
 The Allies were allowed a Naval bombardment. Basically we could only pin a bunker, but it was possible to knockout a Tobruk, and anything outside a bunker. As luck would have it, the 50mm quick firing gun opposite the US was destroyed. All the Germans vehicles - halftracks, were destroyed, and half a platoon in the town, facing the British. Part of the games victory conditions were to secure the French from the Germans. This was done by killing them, 6 out of 8 civilian bases were killed. The Germans waiting for the Allies. All German forces have been deployed prior to the Allies laying out for move 1.
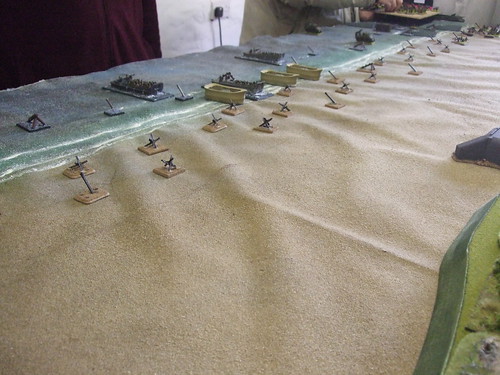
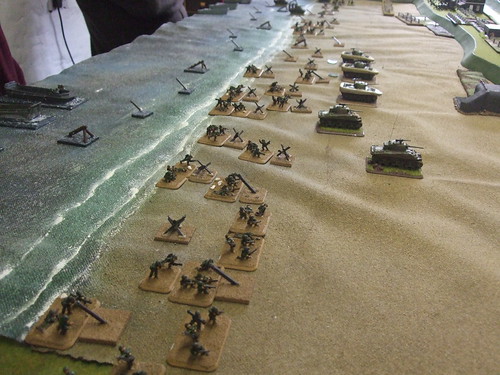
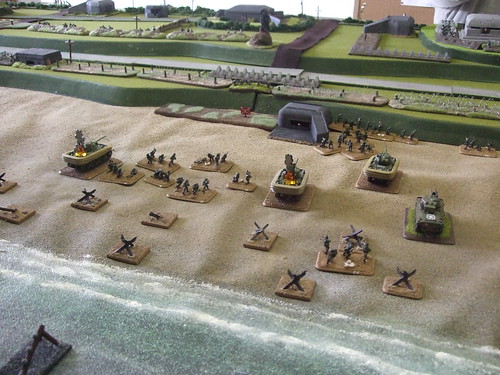
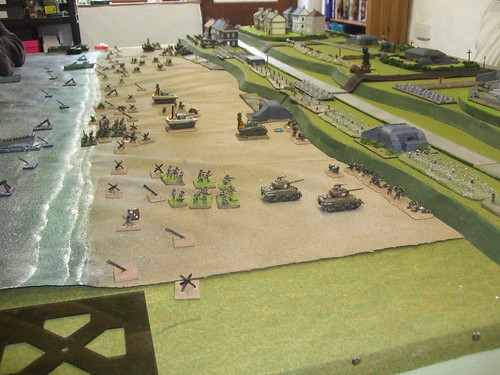
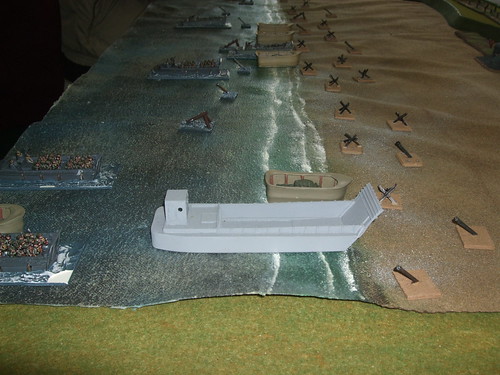 US forces have hit the beach. Each landing craft and tank had to roll for drift from initial deployment. All the DD Shermans had to roll for swamping on the way in as well, with all tanks having to roll a bogging check when they moved up the beach.
Contrary to actual events and circumstances, ALL the DD Shermans made it onto the beach with minimal drift out of position. I have read of whole battalions of tanks being swamped out 2 to 3 miles from the beach, with only a few tanks actually making it onto the beach. Of all the things that had to go right, this was the key to the assault.
The landing craft did spread out along the beach mixing platoons and commands but enough landed close together to make effective units. About half.
 View of the beach from the German coastal battery. In the far distance to the top right, the British were struggling with getting anything on the beach at all.
 US troops on the beach, hunkering down behind the tank traps/obstacles.
 What ended up as the most coherent group, heading up to the bunker guarding the exit off the beach.
 The British have started to land.
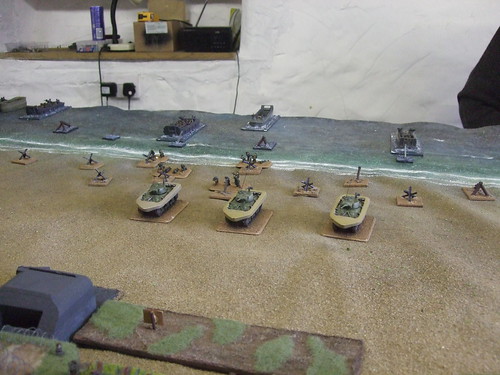
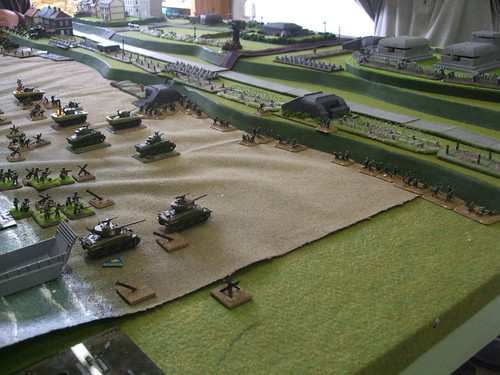
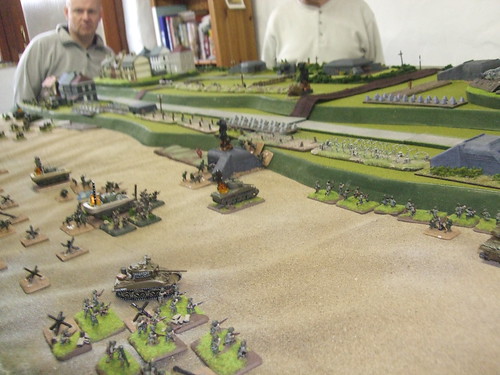
 A view down the beach, as the US start to move on up the beach. The DD Shermans were separated so the smaller group had to move across to the larger, and 2 platoons were split, so they had to move towards each other. Fire started to come in from the bunker, but with fire from the quick firing 50mm not in the equation, the Shermans had half a chance.
 The view in of the British zone, with only 1 platoon in 2 groups on the beach.
 Overview of the beach, with some of the US landing craft returning from the beach to form up for the second wave. at this point only 2 landing craft are still trying to land troops of the 1st wave.
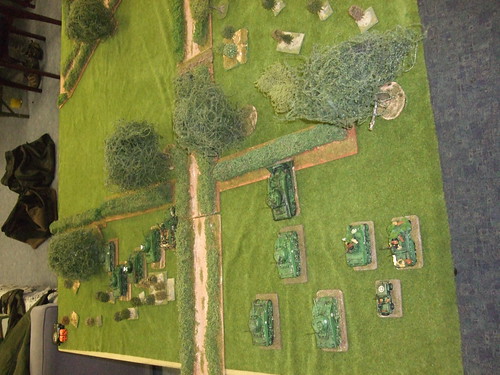
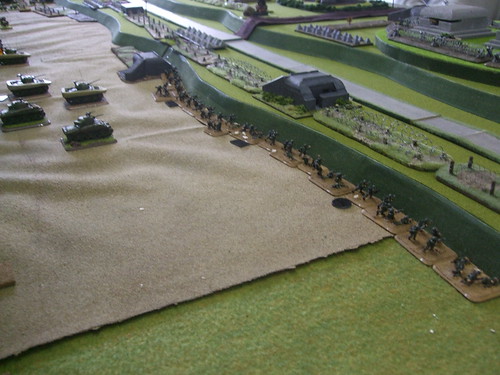
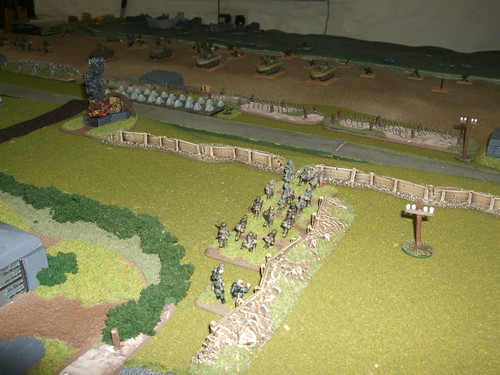 German reinforcements moving on and up the hedges to deploy into the prepared positions in the centre.
 I managed to push the US troops up to the seawall, but took pretty heavy casualties on the run up. To get there, the infantry had to double, which doubled the effect of the German hmg's firing at the infantry. They did get cover from the seawall, but not all of them. The problem was how to clear the obstacles without getting killed. Reduction of the bunkers was presenting a major problem. I was however now able to fire at the Tobruks, and close enough to assault the bunkers.
 The British trying to get up to the seawall, but suffering. The infantry were fighting their way up with the small but lethal force in the houses.
 View onto the beach of the US forces assaulting the bunker on the beach. It also shows the 2 Tobruks firing onto the US infantry sheltering behind the seawall. The tanks were having a largely ineffectual duel with the bunker. Even though there was only a 50mm Pak in the bunker, it was to much for the Shermans. However the dice Gods were looking favourably on the US, with bailouts and motivations. It wasn't enough though, with the Shermans slowly being wittled down. There were however enough for the US to eventually wear down the defences.
 The British had by now lost half their wading Shermans, and still struggling to get to the seawall. They had to clear the wire in front, which they had by now started on, despite the incoming fire.
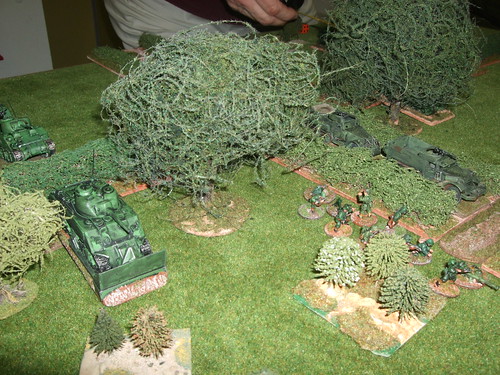
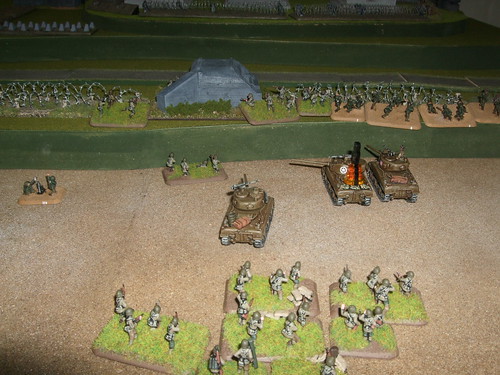
 German reinforcements had been slow off the mark, but were starting to make their presence felt on the table, with the appearance of 3 Stugs moving up through the town to engage the British Shermans and infantry.
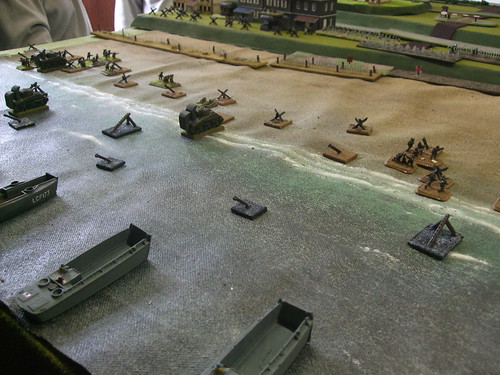
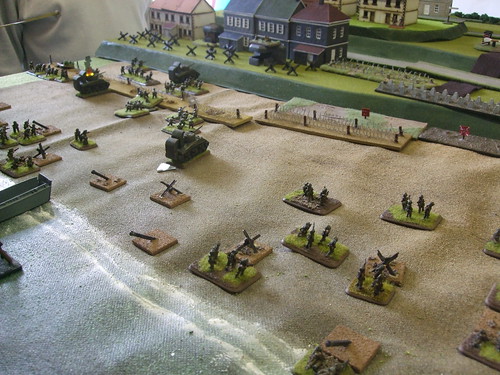
 View of the US landing. The 1st wave is now all ashore, and the 2nd wave is about to hit the beach.
 Infantry are trying to assault the bunker, from the front and rear. This proved to be a futile and bloody assault as nearly all bar the 2IC were killed by the gun crew and supporting fire from the Tobruks. The IC was left behind cowering behind a tank trap on the beach, promoting a tank to replace the dead tank platoon commander.
 The second wave has now landed, with a much reduced 1st wave behind the seawall.
 The British have finally got their 1st wave on, have cleared the wire, and moving up to the houses.
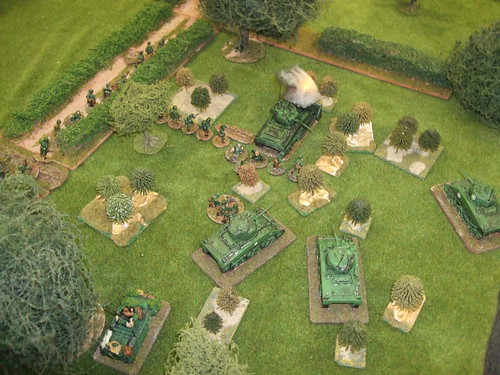
 The US 1st wave has been heavily engaged. The 2nd wave are moving up to the 1st wave to continue the attack.
 View down the beach showing the state of the landings. M4a3e8's substituting for M4's. Will swop when have more casualties.
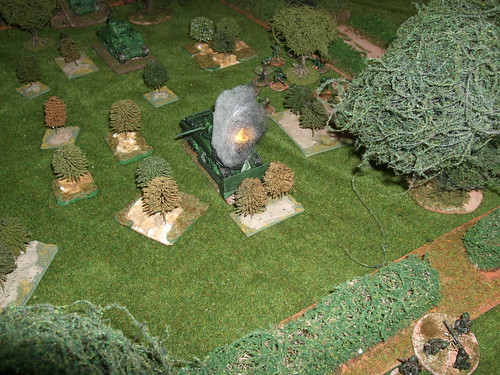
 Germans have now brought on Marders behind the Coastal Battery, but they have been able to wipe out the Shermans. Only the 3 in the second wave are operational. The 1st wave is now practically wiped out, with IC, 2IC, and 10 bases left on table, out of 28 bases.
 The 2IC and 3 bases manage to take out the bunker, opening up the route off the beach once the wire and mines are cleared! The 2IC would get the medal of honour for his actions. This was a key moment in the assault for the US, as they also managed to clear the 2 Tobruks above the seawall, defending the Coastal battery. This would allow the 2nd wave to move up to take the battery.
 View of the German side showing the Marders lurking at the back of the battery. However there are no infantry to protect them from the US infantry.
 The 2nd wave is moving up the seawall to assault the battery. In the process they destroy the bunker protecting the top of the seawall.
Game was paused at 5pm and left out to be continued on the 22nd. Move 9, Allied turn.
The tank traps would provide cover for infantry, and obviously provide a barrier to any vehicle movement. Again, affecting the game would be the seawall from the beach, which was to provide cover for the infantry, but impassable for the tanks/vehicles. The seawall stretched across the table, but was cut at 2 places by roads, the only exit off the beach for the tanks. These were blocked by mines, wire and 2 concrete bunkers.
Contrary to actual events and circumstances, ALL the DD Shermans made it onto the beach with minimal drift out of position. I have read of whole battalions of tanks being swamped out 2 to 3 miles from the beach, with only a few tanks actually making it onto the beach. Of all the things that had to go right, this was the key to the assault.
The landing craft did spread out along the beach mixing platoons and commands but enough landed close together to make effective units. About half.
View of the rather large gap in the german defences that the column of reinforcements is in the process of trying to fill in.
The British are slowly landing their troops, but taking casualties from the dug in germans in the houses.
Game was paused at 5pm and left out to be continued on the 22nd. Move 9, Allied turn.