A game report using Battlegroup Kursk rules adapted to play 1980's modern, when men who wore moustaches, wore real moustaches!
At the weekend Nick T and myself put on a display game at the Plymouth Area Wargames show, held at the YMCA, Honicknowle Lane, Plymouth. Its a regular show, that starts the year off to a very good start. I've been going for a number of years, playing in the DBM competitions. However badly I've played, the atmosphere that the competitors, organisers, traders and visitors to the show generate make it a really good show. South Somerset Wargames group was invited to put on at first one game, and later two games. The first was a Napoleonic excursion, and the second was to be a Modern game. As things progressed last year, we were not able to put the Napoleonic game on, and were able to extend the Modern game to take advantage of the space we had for both. Then there was two. Just two of us to put the game on, with 20 ft of table. No problem. The solution was Gyros Teller Part I, a display game put on at Yeovilton 2013. Nick went to work fleshing out Part II, a Soviet Motorised Rifle Regiment assault on a small town in Germany. Nato defenders would be a Belgian contingent making a fighting withdrawl through a German screen, whilst a Brit battlegroup formed a MLR around the town, allowing the Belgians to refuel/rearm and counterattack. There would be an airborne assault on the canal bridge to the towns rear. We would use a modified Battlegroup Kursk ruleset to provide the core to gaming the encounter, slightly tweaking some modifiers, and with specs for the vehicles and weapons involved.
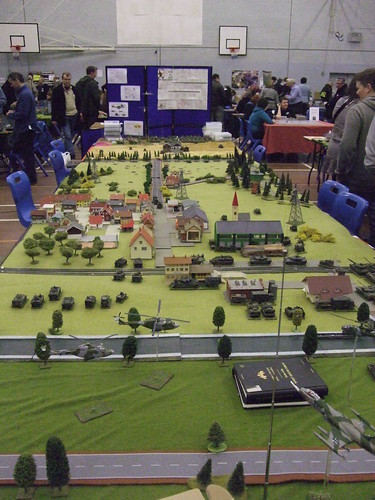
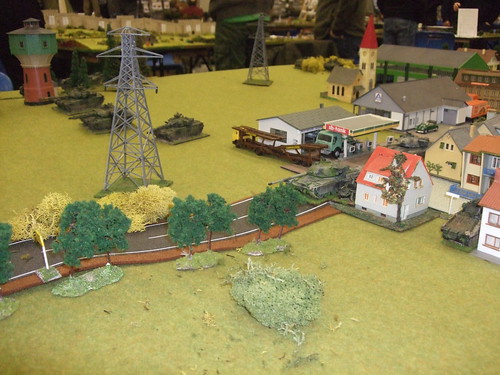
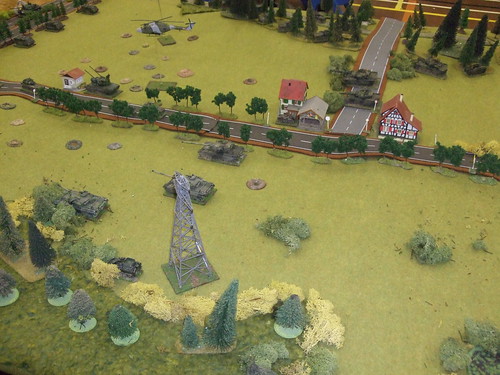
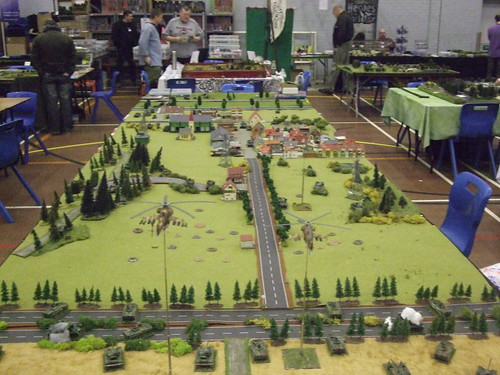
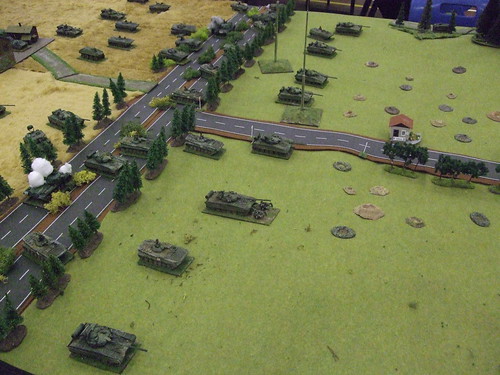
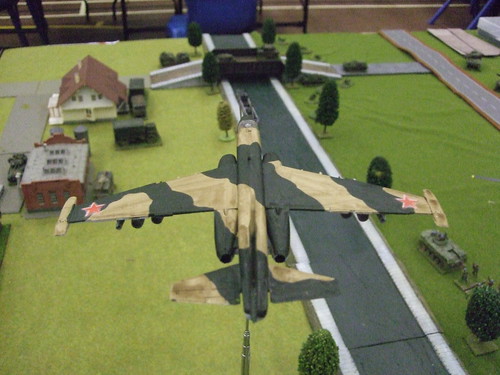
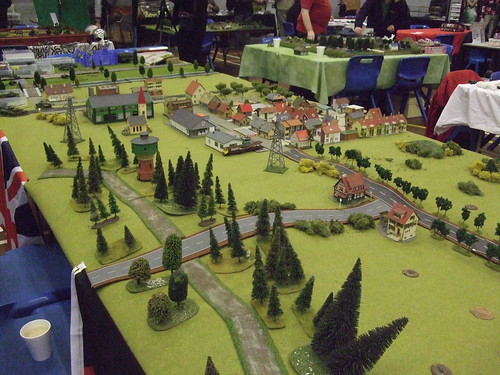 3/4 view of the table facing Nato prior to deployment.
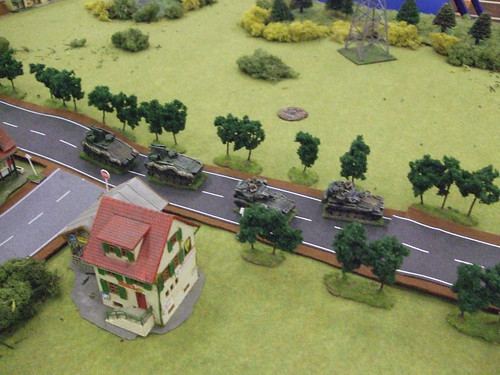
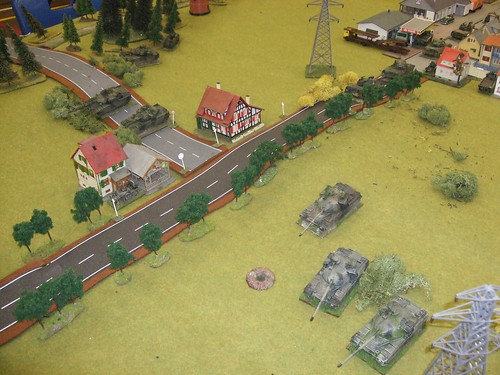
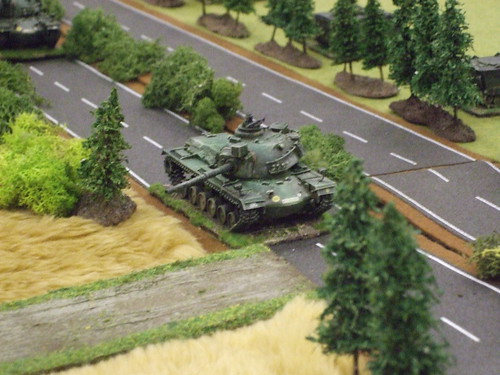
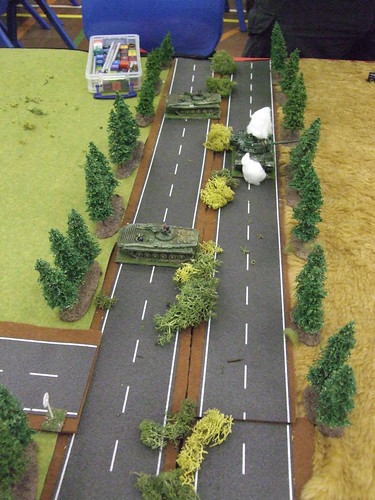
 Belgians about to withdraw through the Germans defending the autobahn, and providing a stopline to any Soviet recce elements. The Belgians had 4 Leopards and 2 Scorpions. The Germans had 3 M48's and a platoon of infantry in 3 M113's
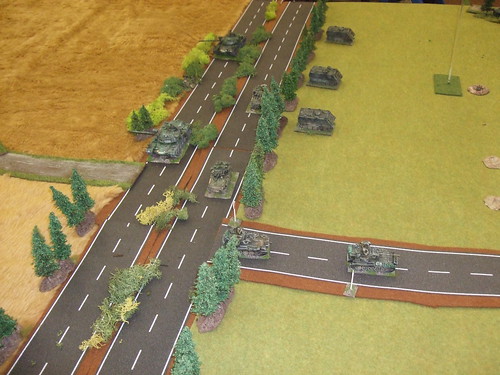
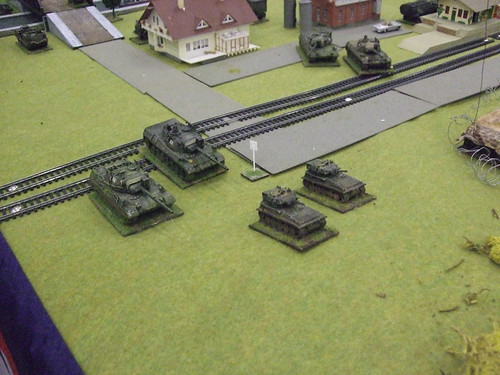
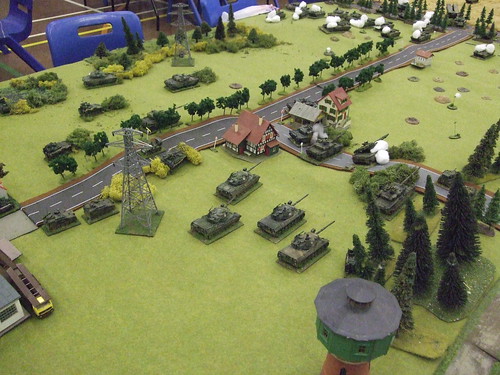
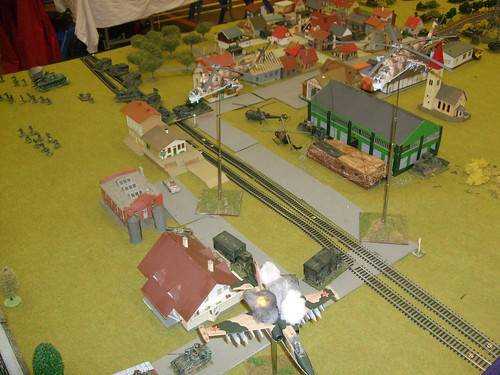
 1st Royal Scots Battlegroup about to move up to form the MLR, if the Germans can hold off the Soviets.
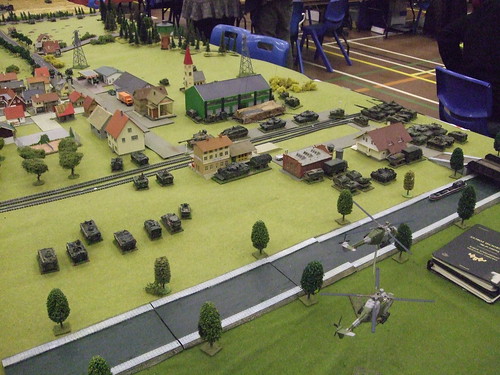
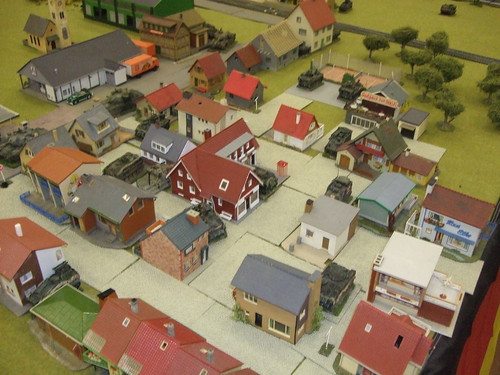
 View down the table from the canal end.
 Belgians on their way back for fuel, ammo, blond beer, chips and mayo, courtesy of 33 Armoured Brigade.
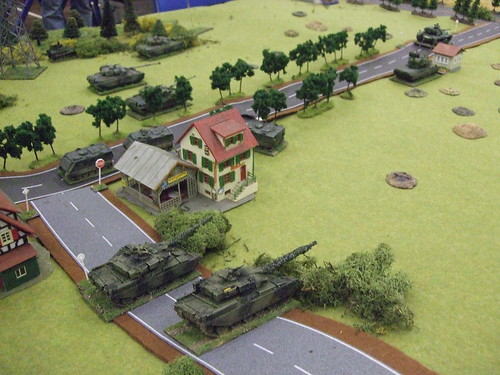
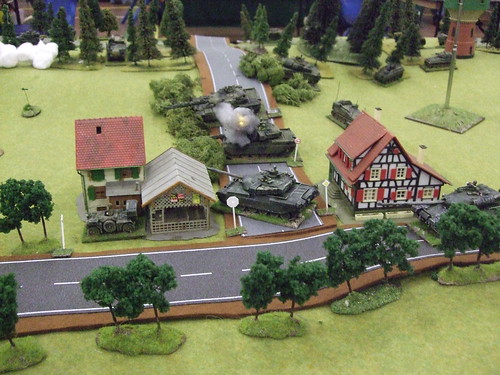
 Light armour elements of Scots DG heading up to recce forthcoming Soviet advance. 2 Milan units following the 2 Scimitars . This house is at the middle of what will be the MLR either side of the road into Gyros Teller.
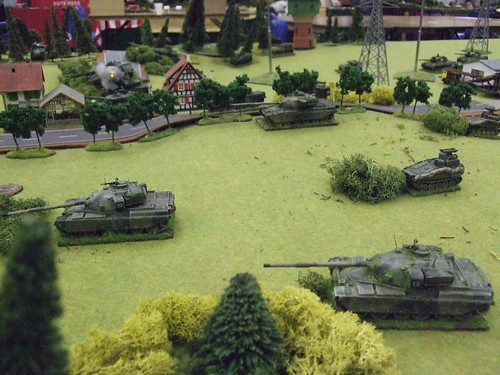
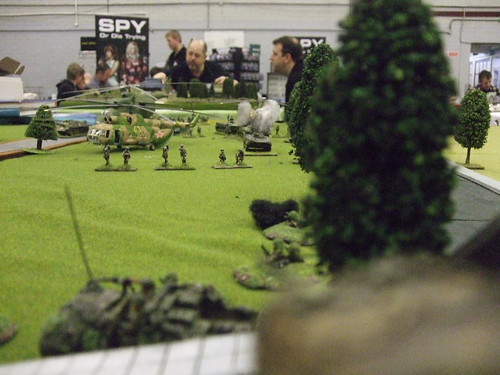
 Scots DG on the move. B troop providing the armour, with 'yellow handbags' safely stowed. The Chieftains will go hull down along the track to the woods, the infantry to provide ambush along the forward edge of the wood. The MLR would stop the advance, the wood would be the key to flanking the MLR. As soon as the advance stopped, the pressure would be on the infantry to hold as long as possible for the Belgians to be brought up to counterattack. A troop leading another platoon up through the middle of town to take position.
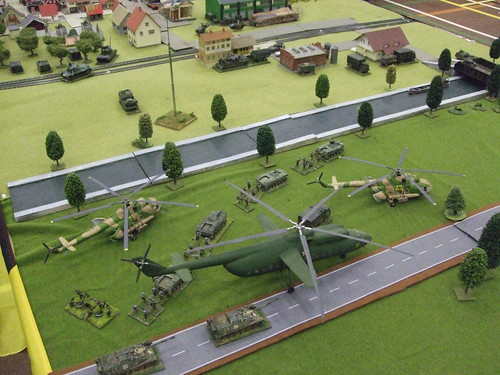
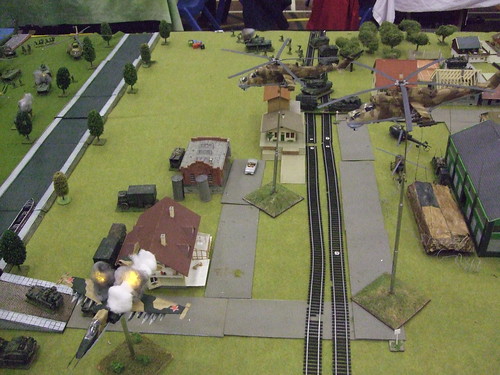
In shot is the Brigade HQ camoed up to the factory warehouse. Vehicles parked under camo sheets to provide covered area, and space around for liason vehicles and helicopters. The RE unit has parked its tracked vehicle to the side, whilst the POL elements are just in shot at the top of picture next to the bridge/railway line.
 The Belgian Leopards racing down the road back into town, flying past a Gepard on local AA defence for the screen set up by the Reserve Panzer Battalion. In shot to the top of picture are the M113's of the infantry platoon supporting the M48's. They have a Milan team deployed out that's not visible. Shell holes from a previous bombardment.
 The MLR is beginning to form up. B troop moving up, and A troop about to leave road to deploy. Milan unit visible at edge of Gyros Teller about to move out.
 The Scots DG Squadron HQ and a platoon of infantry move up in vehicles. 2 mortars deployed back, with medics and Wombat moving up to centre of town.
 A troop moving out to deploy into the MLR, and form a gunline with B troop the other side of the road. The Belgians are retiring down the road.
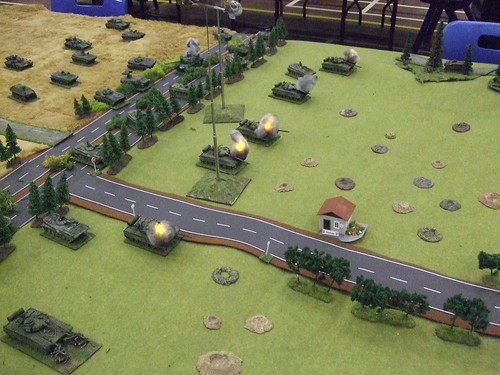
 The German screen is engaging the Soviet regimental recce troop, hoping to hold long enough for Scots DG to deploy. Already the Soviets have started to take casualties, but in doing so have revealed Nato forces on the autobahn.
 Scots DG moving up, as the Belgians head for their well earned 'yellow handbags' and fuel and ammo from the POL site at the canal bridge. B troop are in position, but A troop will need to move forward more. Basis for defence was to draw Soviets in onto A troop, B troop supporting, whilst the infantry and Milan/Swingfire ambush/attack the flank of the attack. A troop need to deploy forward to allow room to fire and move back if the Soviet advance cannot be slowed.
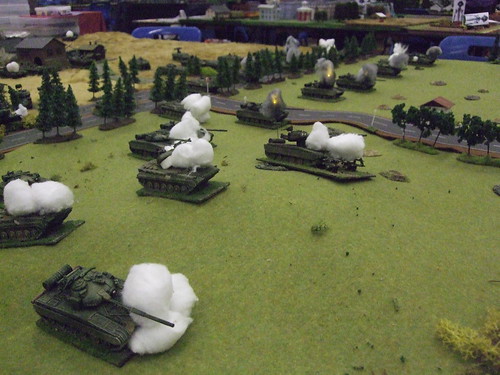
 Having driven off the recce screen, the Germans are about to find themselves in a target rich environment. The last of the Belgian Scorpions head off - job done
 The infantry of the Scot battlegroup have established themselves in the treeline securing the flank of the Scots DG gunline being established in the valley below. The troops are digging in preparing the ambush, however its also a pretty obvious place to deal with for any advance into Gyros Teller.
 The remains of the Soviet recce troop, the survivors of which have headed back to the regiment, reporting in details of the Nato deploymynet on the autobahn. As far as they know, its just a few elements of a reserve German formation, the Belgian forces the Soviets were chasing have run off leaving them in the lurch. However, the Brit Gazelle moving up with Scot DG has also observed the whole action reporting on the recce probe and the large concentration seen in the distance, but not visible on table.
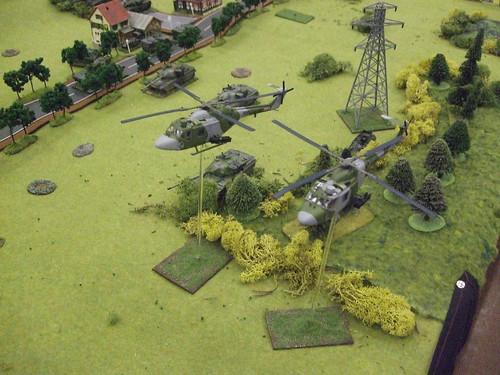
 The Gazelle has called up 2 Lynx's to help degrade the initial assault on the Germans and slow down the general assault. They are flying over the German Gepard providing local AA cover. The Soviet main force is now on table and starting to engage the Germans.
 Wider shot of the table showing Scot DG in position and the right hand M48 out of action. The German Milan team shoots up a BMP, as do the rest of the surviving tanks, but the amount of Saggers in the air is starting to take its toll. The Gazelle if hovering around reporting back composition and direction of Soviet forces. A Brit Blowpipe team has moved up with the Chieftains to help with air defence against Soviet helicopters when the arrive.
 Closeup of the centre M48, with the deployed infantry's M113's behind the treeline of the autobahn. Things are starting to get hot for the Germans.
 View down the table towards the treeline. The German infantry have got out thanks to the remaining M48, which is now heading into the Gyros Teller. They have been told to form up next to the canal at the rear beside a wood, and await orders. Belgian and German liason officers in helicopters have arrived at Brigade HQ to coordinate any further action, initially a Belgian counterstrike with the support of Scots DG if and when the Soviet advance is disrupted.
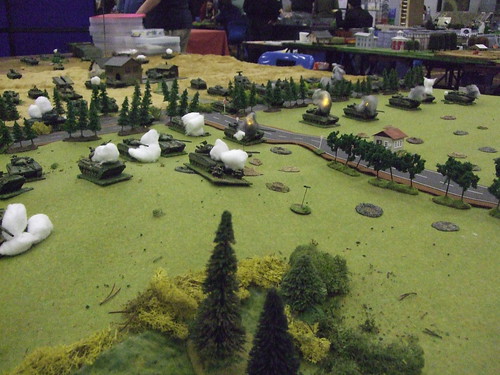
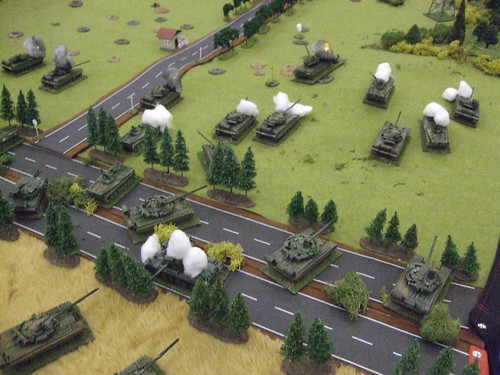
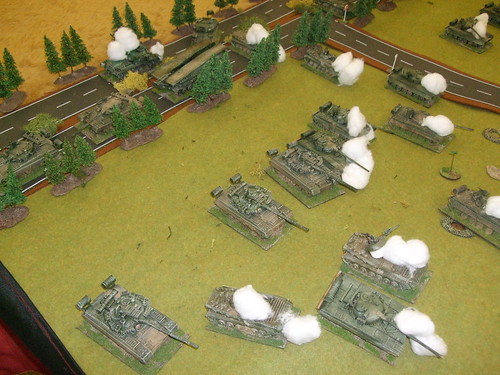
 The Soviet advance up to their staging area for their advance into Gyros Teller and seizure of the canal bridge. A burning German M48 at the bottom.
 The Brit Lynx's are having an effect, but ...
 Closeup of the retiring M48, with the Gepard about to withdraw as well.
 Closeup of the Soviet advance past the farm to the autobahn. The Soviets will establish their MRR battalion HQ around the farm, with counter battery radar, SA13 anti air and comms.


At the weekend Nick T and myself put on a display game at the Plymouth Area Wargames show, held at the YMCA, Honicknowle Lane, Plymouth. Its a regular show, that starts the year off to a very good start. I've been going for a number of years, playing in the DBM competitions. However badly I've played, the atmosphere that the competitors, organisers, traders and visitors to the show generate make it a really good show. South Somerset Wargames group was invited to put on at first one game, and later two games. The first was a Napoleonic excursion, and the second was to be a Modern game. As things progressed last year, we were not able to put the Napoleonic game on, and were able to extend the Modern game to take advantage of the space we had for both. Then there was two. Just two of us to put the game on, with 20 ft of table. No problem. The solution was Gyros Teller Part I, a display game put on at Yeovilton 2013. Nick went to work fleshing out Part II, a Soviet Motorised Rifle Regiment assault on a small town in Germany. Nato defenders would be a Belgian contingent making a fighting withdrawl through a German screen, whilst a Brit battlegroup formed a MLR around the town, allowing the Belgians to refuel/rearm and counterattack. There would be an airborne assault on the canal bridge to the towns rear. We would use a modified Battlegroup Kursk ruleset to provide the core to gaming the encounter, slightly tweaking some modifiers, and with specs for the vehicles and weapons involved.
In shot is the Brigade HQ camoed up to the factory warehouse. Vehicles parked under camo sheets to provide covered area, and space around for liason vehicles and helicopters. The RE unit has parked its tracked vehicle to the side, whilst the POL elements are just in shot at the top of picture next to the bridge/railway line.
View from the other side of the table. With the SA13 battery on table, the Soviets are able to chase off the Lynx's, shooting down one of them. The Gazelle and the remaining Lynx withdrew to the town away from the SA13.
Soviets nearly fully deployed, with a company of T80's to come on still. HQ elements can be seen heading for the farm to establish a command post for the forthcoming operation.
Lead elements in the treeline, reporting back on the clear approach to Gyros Teller. Scots DG are hulldown under cover waiting for the attack, all helicopters have been withdrawn away to the rear.
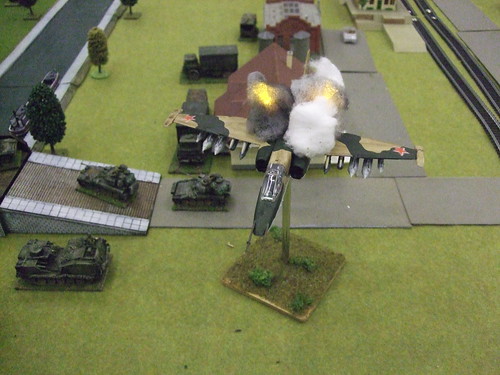
A Sukhoi flys in to take a recce of the town, quickly attracting the atention of the Blowpipe team placed forward. Taking evasive manoevre, the pilot isn't able to make any worthwhile recce of the town. It will fly off to circle and come in later when there is an identifiable target.
View down the length of the table showing 2 Hinds hovering above the MRR looking for oportunities. It also shows the choke point formed by the wood on the left and the rough ground on the right that will form the Nato MLR.Also the importance of the wood to the Nato position on the left.
Wih the attack about to commence, an infantry platoon has been ordered up to secure the end of the wood against a possible assault along that flank through the wood.
The Belgians having been fueled up and loaded are ready to be committed. Support from the infantry in the edge end of the woods can be given to them should it be required in the defence or assault.
The assault begins, with the move through the treeline forward into the open.
The Chieftains open fire - A troop have only 2 Chieftains able to fire, and get only 1 hit. B troop have all 3 Chieftains able to fire getting 2 kills, with the Striker battery getting 1 and the Milan team in the woods getting 1. Game on.
A view down the table to the treeline. The flames of a Chieftain from B troop can be seen above the house on the right, as well as saggers in flight heading in.
View from A troop, with the forward Chieftian appearing exposed, but lying down in hulldown position. It was decided before the game that unless speciifed otherwise, the Chieftains would be using the folds of the ground as per standard operating procedure for the Brits. As it happened, the hulldown factor was not used in calculating the to-hit value for the dice. The gentle rise to the left of the picture would have an important effect on the Soviet advance. Shielding the Scots DG from fire, and forcing the Soviets into piecemeal attacks and movement.
With all the saggers flying around, it began to look quite serious for the Brits, however as the Soviets advanced over the rise, they took a pounding themselves from the mobile Milan backing up A troop, as well as A troop themselves. A lot of hits took place but with the 120mm rifles and Milan, a hit was generally a kill, whereas the Soviets needed to roll above average to get a Nato kill. The Chieftains were quite tough beasts. Mobility kills were a greater problem than actual penetration kills.
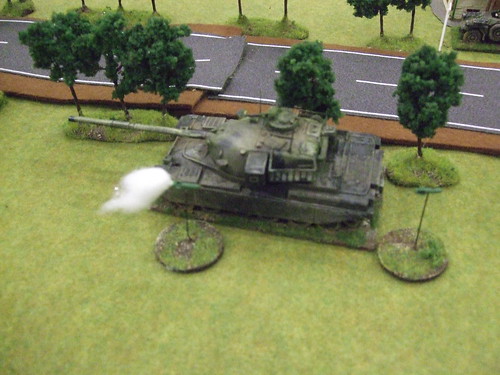
A sagger flies past an A troop Chieftain. That was close!
' Sir, are they picking on us, Sir?' A second sagger comes flying in, and just misses. both hits were penetration and mobility kill failures. It was time to get out of the position though.
Whilst fun and games were going on, business was as usual with A troop. The Soviet attack against them was about to flounder, not enough armour and its support could be pushed through, becuse it wasn't there anymore.
Showing the readjustment of A troops position, and also the support of the 2 Milan units that really helped them defend their position.B troop in the background have lost a second Chieftain, after 2 sucessive mobility kills, a sagger came through and got the kill. The amount of fire into B troop brought the reserve troop of 2 Chieftains and Squadron commander up through the town to support B troop. The 2 Chieftains from the reserve are visble coming out of the town into the MLR
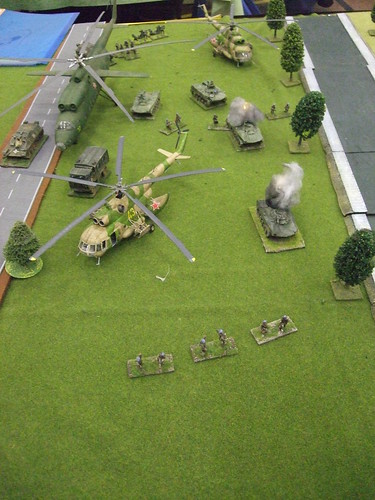
There had been reports of Soviet rotary aircraft in the general area, but with things happening on the edge of town, when I went for 2 cups of tea for us, I came back to find out that they were true. Soviet paratroops had landed a platoon with 4 BMD's, 2 ASU85's and 2 120mortars the otherside of the canal, and were moving to seize the bridge. This was now the time for the TA unit guarding the bridge to get in some serious action.
The other side of the canal, with the POL unit vulnerable, as well as the RE Centurion, the brigade HQ is having kittens and sends the German Reserve unit to engage the paratroopers, as well as 2 Scimitars to reinforce the TA unit. Meanwhile, the Sukhoi is commited to a bombrun onto the TA unit and the bridge. The Soviet commander has ordered up his Bridging unit and engineers with the third wave. He is not fully aware of all the difficulties his forces are encountering.
The reserve troop take up positions to support B troop. The Swingfire battery has withdrawn fromthe edge of the wood out behind theMLR to redeploy into it if the line collapses. The infantry that were in the edge of the wood are withdrawing back to Brigade HQ for orders. The Light tanks from Scots DG set up at the crossroads in the woods in ambush.
View across the table with the inbound Sukhoi, and the 2 tracked Rapiers that it is flying over, as well as a Gepard. the TA unit is well dug in expecting a determined assault.
A view from the Sukhoi as it heads in, taking ineffective fire from the 1st Rapier, a complete miss from the Gepard, and the first shot from the Rapier at the bridge.
The MLR has been reestablished with the reserve troop. In the background is the BM21 rocket strike that fell just short of the treeline of the woods. Also a forewarning of what would be the fate of the infantry and Swingfire that was positioned at its edge. Luck was definately smiling on the Nato forces.
With the third line forming up for the - effectively - final assault, the forward observers for the Brit artillery had been busy, their first call had overshot, but with their second call they managed to get a battery of Abbot's onto the Anti Tank platoon of the MRR. The smoke in the top of the picture shows the devastation this caused, but also evident in the picture is the access and advantage seizing the wood could give the Soviets. The Anti tank platoon would have been the unit to send through the wood and secure it.
As a result of the second call for artillery on the Soviet formation, the battery got picked up by the counter battery radar set up with the forward command in the farmhouse. Tough call for the Nato forces, but the Abbot's got stonked by the rocket battery. However, a swap of the Abbots for the BRDM Anti tank platoon would be a short term no brainer however badly handled by the Brigade commander - me.
The right flank of the Soviet advance shows how little the Soviets have managed to move.
With the final Rapier missile fired, before the bomb run, the Sukhoi is fatally hit, forcing it down to crash off table. The 2 Scimitars sent to reinforce the TA unit are heading the bridge to engage the paratroopers. However the TA Fox's have been busy, firing into the advancing Soviets.
The paratroopers have been hit in the flank by the Germans - the M48 and the Milan team from the infantry. The paratroopers have hit back, destroying the M48 with a sagger from one of the BMDs, and are advancing onto the TA psoition.
View from the bridge, from the turret of one of the Fox's.
The 2 Hinds have turned up to interfere with Nato reaction to the heliborne landing. in the distance are the advancing Germans heading towards the canal bank. However, with the amount of AA in the area, even the Hinds will not be tempted to hang around, and prepare to leave the area, reporting the very hard time that the paratroopers appear to be having.
With the heliborne landing safely controlled, and the threat to the rear area neutalised, the Belgians are ordered up to the MLR, to position themselves for a counterattack. Light tanks are sent up through the wood to push forward and recce the Soviet forces at the treeline, and any other information tht can be found.
It's over. Soviet battalion command has to report through to the MRR commander that the attack has met superior forces, and is duly told to reposition his advance. He sends his T80's and the bridgelayer down the autobahn to bypass Gyros Teller and resume the attack. What remains of the first 2 lines forms aflank defence for the movement.
The heliborne assault has completely failed now. Terrific firing by the Ferrets and fire from the TA infantry has stopped the attack dead in its tracks, as well as help by the German reservists.
Another shot of the Nato side of the canal area and the rear echelon - retiring POL units, the Brigade HQ, the Germans in the distance, and the 2 Hinds and damaged Sukhoi.
That was the end of the display game. A really big thankyou to Nick T for the invite to participate, the members of PAW - Plymouth Wargames club who put on the show every year, and made the invite, and to everyone who came along to the table and hopefully enjoyed our display, and the conversations and positive comments we received.
Time to get my 'yellow handbag' out and start relaxing.
Hi great looking game and minis. Anychance you could publish the ORBATS as I fancy recreating this in 1/300
ReplyDeleteI will post up an orbat in next few days. However, Part III will be at SWMEE at the Bath and West on the 3rd/4th of May, which will be the Belgian counterattack, supported by the Scots DG battlegroup. Small table!!, all 20mm, and full details up on the Blog beforehand.
ReplyDeleteCheers and thanks for your interest and support.
Richard