A very simple game was set up for 2 of the regular KGN players to introduce them to the new and different mechanics of Battlegoup. Although first appearances to the contrary, the 2 sets are very different. Namely the Reaction orders, unit orders and some of the minor mechanisms of play. Errr... also price, layout, scenario's, troop/unit functions...
The game would not be point based, but would be set up to produce a side that should be able to complete their objective, and have sufficient troops to do this - British. Their opponents - Germans, had limited forces but would be on the defense. No artillery would be used, as this would be a kind of encounter and the idea was to keep it simple.
British forces were as follows
Senior Officer - command halftrack and a jeep
Platoon of infantry
Troop of 4 Shermans inc a Firefly
Troop of 3 Churchills
Sherman with a Dozer blade attached to the Sherman platoon
German forces were as follows
Senior Officer - command group with radio van, side car, staff car and Kubel
Platoon of infantry
2 HMG's
1 20mm Flak on a ground mount
1 Pak 40 75mm
1 Piv
1 Marder
emplacements for 2 sections of infantry, Pak 40 and the 2 HMG's
I put in a game rule which was that the Piv with Schurzen would be represented by a Tiger tank on the table, as would the Marder be represented by a Jagdpanther. This was to represent a bit of Tiger fever. However, if the vehicles were obscured and the spotting roll was a 6 at over 20 inches, they would have a chance to be correctly identified. Under 20 was 5 or 6, under 10 was 4,5 or 6. If spotted in the open, they would be correctly identified.

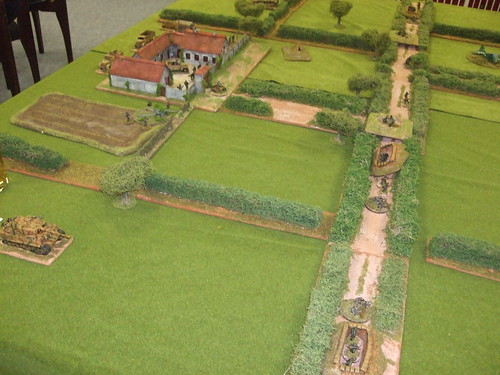
The terrain was farmland around a farm that comprised the centre of the German defences. Hedges would provide soft cover, emplacements and walls hard cover. Infantry could move across the hedges, tanks would have to roll a d6 deduction on their movement to cross, the Dozer equipped Sherman would roll a d6 deduction but move straight through the hedge creating a gap.
The Germans deployed along the centre of the board, 2 sections in emplacements supported by a HMG at either end. The 3rd section on their left lurking in the lane behind a hedge. The Panzerscreck teams were at the road junction to deploy where needed. The Marder was deployed behind the 3rd section, with the Piv on their right, in the open, but obscured by hedges to their front. The Pak 40 was covering the road and field to the front of the farm with the platoon HQ, senior officer behind the farm, and the 20mm at the edge of the farm.
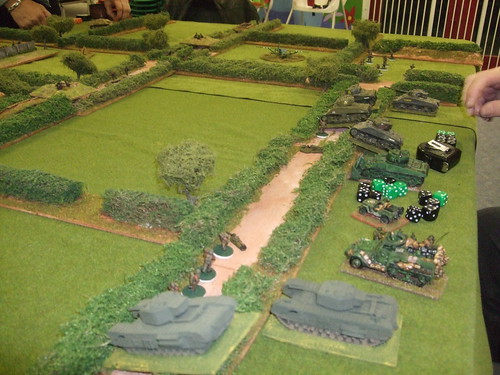
 The British deployed all the infantry in the lane, their senior officer and transport behind the lane. The 3 Churchills were deployed on their left, then the Sherman Dozer, and the remaining Shermans to the right.
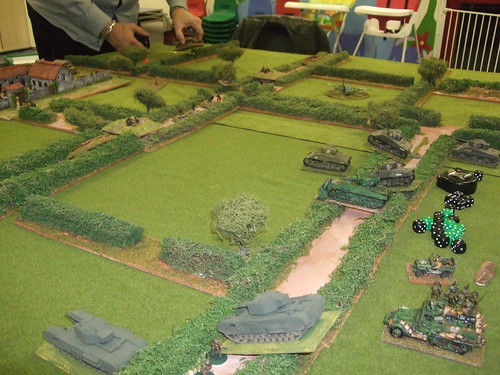
 British moved off from the lane, sending the infantry forward in front of the tanks, who were struggling to cross the hedges. The Churchills were having a horrendous time, taking several moves to eventually to get across. The Shermans were more successful, but with the infantry out to their front, the British infantry took a dreadful shellacking from the remaining German troops in their emplacements before the tanks could engage.
 German casualties were spread through the line of defences, but they lost a section and a HMG to the firing. After losing 2 sections of infantry the British only had infantry on the left, supporting the Churchills. With the lack of infantry, the Shermans moved across the front, veering to the left, away from the German infantry coming across the line from their left. However, they did not move far enough away from the Panzershreck teams at the crossroads. The right hand
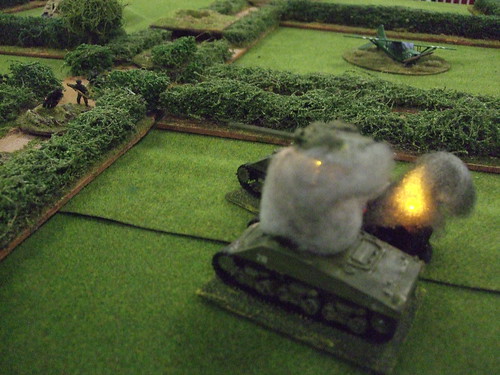
 Shermans engaged the teams with direct fire killing one team, but the other team passed all its cover saves when it received hits. That was, if the British could spot it - they consistently rolled 1's and 2's for observation spotting for their direct fire.
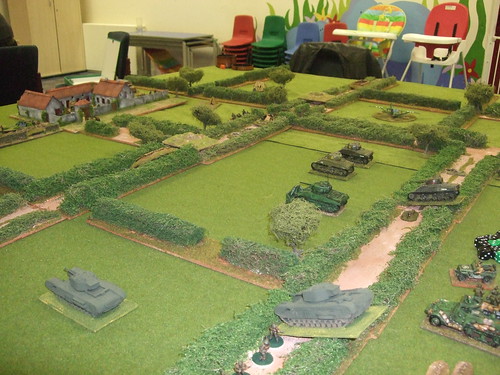
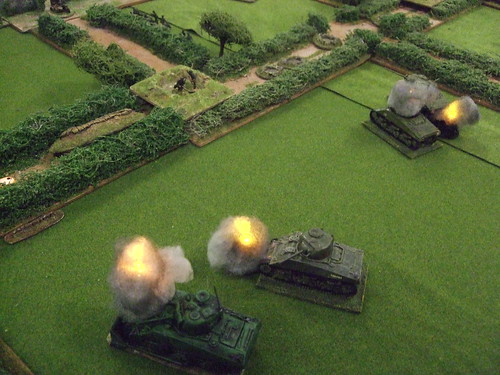
This then produced something that I have not seen in any game I've ever played. The surviving team kept making its saves whilst putting 2 shots into the 2 Shermans destroying them both. They then moved along the lane to engage the other 2 Shermans, and with 2 shots destroyed both of those as well.
 The Firefly was slowly making its way up the lane to the farmhouse, but was nervously expecting the Jagdpanther to engage it. The Jagdpanther was not visible to anything on the table, but the effect it had was significant, I think. Not the effect that a Marder would have had.
The Churchills moved forward with the infantry behind, but trying to engage the Tiger, could not get a hit, apart from one which failed on penetration. The penetration was against Piv armour, and failed completely though Ian wasn't told this, rolling 4 on the dice said it all . Likewise the Tiger could not get any hits on the Churchills.
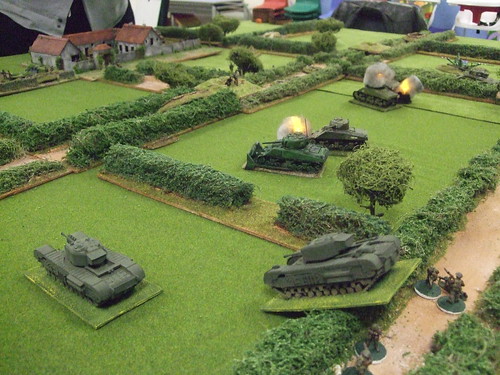 The only possible anti tank that could have got a result would have been the legendary Panzershreck team moving along the lane from brewing up the 4 Shermans.
A very good, enjoyable game, with quick and fluid turns, and the opposite of the game I set up some time ago as an introduction to KGN. I learnt a valuble lesson in not trying to pack too much into a game no-one had played before. Thanks to Ian ( British ) and Mike (German ).
The game would not be point based, but would be set up to produce a side that should be able to complete their objective, and have sufficient troops to do this - British. Their opponents - Germans, had limited forces but would be on the defense. No artillery would be used, as this would be a kind of encounter and the idea was to keep it simple.
British forces were as follows
Senior Officer - command halftrack and a jeep
Platoon of infantry
Troop of 4 Shermans inc a Firefly
Troop of 3 Churchills
Sherman with a Dozer blade attached to the Sherman platoon
German forces were as follows
Senior Officer - command group with radio van, side car, staff car and Kubel
Platoon of infantry
2 HMG's
1 20mm Flak on a ground mount
1 Pak 40 75mm
1 Piv
1 Marder
emplacements for 2 sections of infantry, Pak 40 and the 2 HMG's
I put in a game rule which was that the Piv with Schurzen would be represented by a Tiger tank on the table, as would the Marder be represented by a Jagdpanther. This was to represent a bit of Tiger fever. However, if the vehicles were obscured and the spotting roll was a 6 at over 20 inches, they would have a chance to be correctly identified. Under 20 was 5 or 6, under 10 was 4,5 or 6. If spotted in the open, they would be correctly identified.
The terrain was farmland around a farm that comprised the centre of the German defences. Hedges would provide soft cover, emplacements and walls hard cover. Infantry could move across the hedges, tanks would have to roll a d6 deduction on their movement to cross, the Dozer equipped Sherman would roll a d6 deduction but move straight through the hedge creating a gap.
The Germans deployed along the centre of the board, 2 sections in emplacements supported by a HMG at either end. The 3rd section on their left lurking in the lane behind a hedge. The Panzerscreck teams were at the road junction to deploy where needed. The Marder was deployed behind the 3rd section, with the Piv on their right, in the open, but obscured by hedges to their front. The Pak 40 was covering the road and field to the front of the farm with the platoon HQ, senior officer behind the farm, and the 20mm at the edge of the farm.
This then produced something that I have not seen in any game I've ever played. The surviving team kept making its saves whilst putting 2 shots into the 2 Shermans destroying them both. They then moved along the lane to engage the other 2 Shermans, and with 2 shots destroyed both of those as well.
The Churchills moved forward with the infantry behind, but trying to engage the Tiger, could not get a hit, apart from one which failed on penetration. The penetration was against Piv armour, and failed completely though Ian wasn't told this, rolling 4 on the dice said it all . Likewise the Tiger could not get any hits on the Churchills.
The only possible anti tank that could have got a result would have been the legendary Panzershreck team moving along the lane from brewing up the 4 Shermans.A very good, enjoyable game, with quick and fluid turns, and the opposite of the game I set up some time ago as an introduction to KGN. I learnt a valuble lesson in not trying to pack too much into a game no-one had played before. Thanks to Ian ( British ) and Mike (German ).
No comments:
Post a Comment