Thursday, 31 October 2013

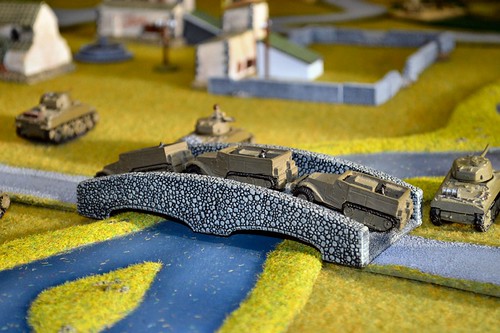
A small town in Germany - Rapid Fire Modern

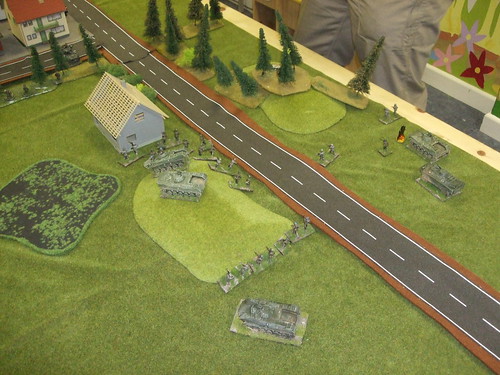
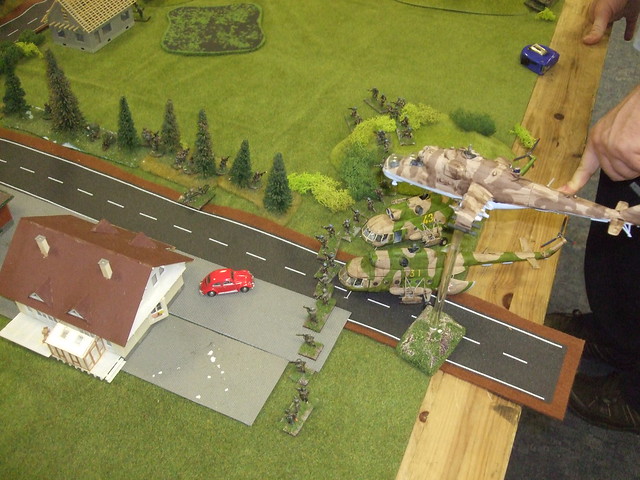
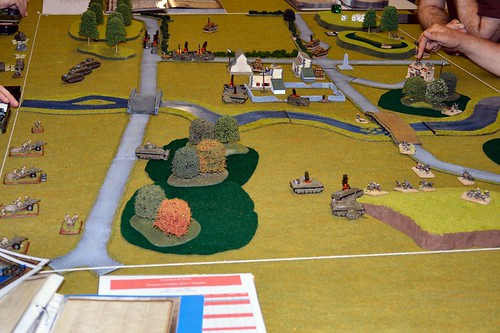
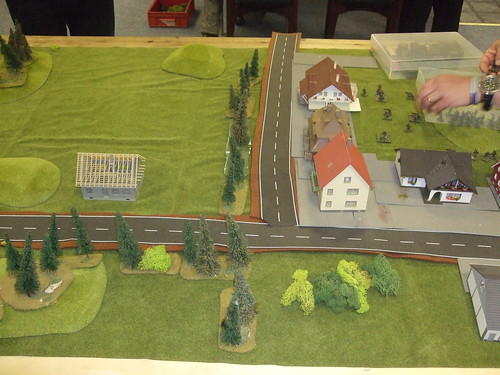
With my usual issues regarding actually getting to an actual game, a weeks holiday meant that I would have a game at last without heading off to work afterwards! Nick T was doing a display game at the Yeovilton Show with UK 6th Airmobile defending against a Warsaw Pact incursion into the North German Plain. The 6th Airmobile would be supported by Chieftains, and Lynxs and a Gazelle, the Soviets would have the full range of gear - Hinds Hips and a truly huge beggar that could carry a couple of London Buses.

The game would be a trial of the demonstration game to see how things would pan out rule wise. It would have a small platoon of 6th Airmobile, a HQ and 2 Scorpions. the Soviets would have rolling reinforcements starting with 2 companies of paratroopers - 2 platoons airmobile in Hips Mil8, 1 in BMD's, supported by 2 ASU85's and a Hind - Mil24. If the Soviets or Brits took a hammering reinforcements would appear etc to balance out and continue the game.

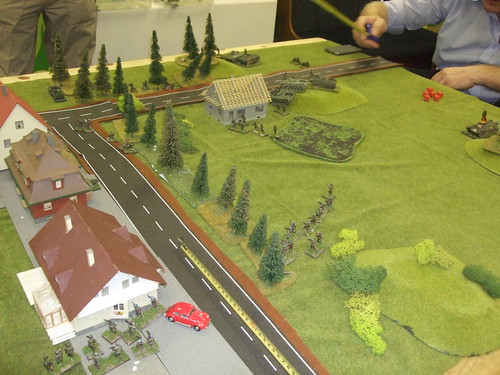
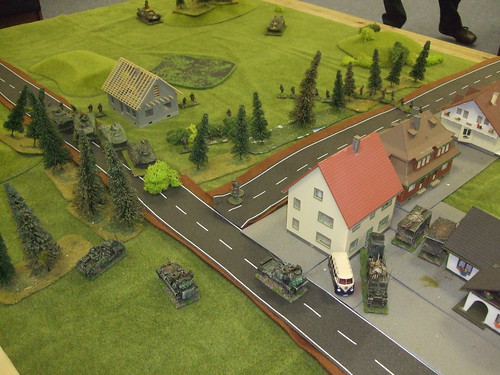
The Brits would deploy into the town to defend it against the Soviet attempt to secure the town and road junction. Deployment would be hidden, until spotted by the Soviets, or they moved out to the open/visible. A peculiar feature of Rapid Fire Modern would be the 'overwatch' ability to shoot in your opponents turn. This reflects ambush, readiness or even ineptness on the part of your opponent! Phew, sorry if that sounds a bit personal, what I really mean is the lack of coordination and tactical awareness by opposing troops. It's a very powerful tool to use, though you can only use it if you didn't fire in your turn prior to firing in your opponents turn. In point of fact it truly is a game changer, and if you are not used to this, its a shock.

So, from sitting at the side of the game, to observe, I became one of the Brits - Ian T was the other Brit. Colin was the acceptable face of  the workers paradise. 1 section was put into the treeline at the edge of the village, another section put into the hill/trees at the side of the road leading to the village, to ambush any traffic and support/flank the treeline. 2 81mm mortars were dug in, in the village, supported by the HQ. 2 GPMG's on tripod were split to support the 2 sections, with 2 Blowpipes spread either end of the sections, and 2 Scorpions in ambush/reserve. A Milan team secured the end of the treeline position to engage any vehicles assaulting the treeline.

The Soviets put the Hind on first, running up the table, to sniff out the opposition. All it sniffed out was the blowpipe team on the British right. Click, whirr, whooosh, and the Hind gets clipped and has to retire off the table for 1 turn. The start of the Soviet sense of humour failure. Next turn, the BMD's roll up, heading up the table, but debussing their troops first turn, 4 moves away from the wood alongside the road. Moving on, the Soviets move on up, waiting for the Hind to reappear, with 2 Mil8's full of troops, and the 2 ASU85's.

The Hind reappeared at the back of the table to shoot up the Blowpipe position, with the Hip's dropping off the troops just before it, one of the sections in short range of the GPMG and infantry section. OOuuchh. One of the Soviet sections is wiped out, the other taking the position.The Milan team then shot an ASU85, ripping it to pieces. By flanking the position in the treeline, the Soviets exposed the 2 Scorpions. Thus,bringing up the Hind to flank the treeline, another 2 Hip's turned up to continue the flanking manoevre. The 2 Scorpions turned to fire at the Hind, with one of them getting a critical hit on the Hind, removing it from play.


The BMD's and infantry, then swung across the road away from the wood alongside the road, to go for the treeline position that had been exposed, but exposing them to short range ambush by the Brits. The Brits opened up, wiping out a section and a half. The Soviets then proceeded to rollup the treeline position - the Brits trying to withdraw along the treeline into the village, but losing three quarters of the men. After the flank ambush, the Brits then attempted to withdraw, but losing three quarters of the men to a concentrated attack by the BMD's. This attack was a shining example of what rule systems seem to induce in wargamers as to how troops in the field actually behave/conduct themselves. Although it is possible to say that it is a point in time that is represented, its also equally valid to say that it is totally bonkers and with 20+ years experience in the British Army even more valid. The BMD's drove up to the position of the retreating Brits, swivelled 60' in the road, several yards away, and opened up with machine guns. Not concerned with hitting the troops with their main guns, or moving to contact unseen troops who have A.T.weapons in a wood (OK, its a Carl Gustav), and possibly blocking the road that they wished to secure.


The sweep up the flank of the treeline began to stall, but the reinforcements moved to sweep up the buildings along the back of the treeline, along the road. The Brits managed to bugout, pulling out the mortars, Scorpions and HQ. Only 6 infantry managed to get out, quite heavy casualties for the force involved. However, the Soviets took a pasting,losing 2 platoons, an ASU85, a damaged BMD and Hind helicopter.


Sunday, 1 September 2013

Battlegroup Overlord - L4 Sentinel and set piece objective - Pt1

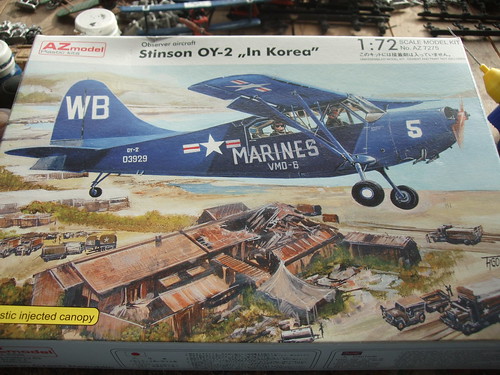
I had been looking for a L4 Sentinel for over a year or more. Prices for the model were knocking around the £25+ level, if the kit was available and my modelling skills were up to it. I had seen a vac form model, as well as a East European kit. I had gone to Yeovilton this year to have a look at the show and 2 old warbirds flying. A Buchon ( spainsh me109 clone ) and Spitfire. Wandering around the various stalls and cider bars I ended up at Plastic Model Kits. After going through their stock I came across the OY2 Korean War version. A Stinson L4 by any other name.

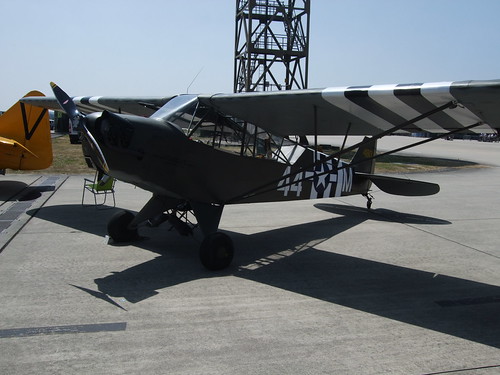
The kit comes with 2 fuselages to do various types, along with 2 plastic canopies. Essentially the carcass for 2 planes. Serendipodously, there was also an old warbird on the static display - a Stinson L4, so out with the camera whilst trying to work out what to do with the kit.


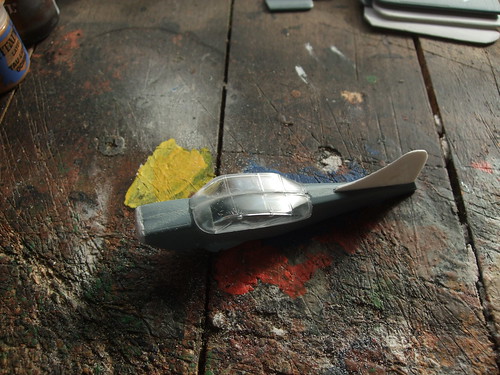
After finishing the WW1 planes I got the OY2 out to play around with. I had the idea of doing an objective marker for BG Overlord with the spare fuselage, but would have to make up a tailplane, rear airlerons and aset of wings. As I would not be entering a modelling competition exactness was not a priority, but I could get the right approxiamations for a crashed L4 as an objective, detail to be painted or drawn on and any bits I couldn't do would be hidden.
With my Mojo starting to buzz - as with the Radio van project and the Tigers, I have started the build of both planes.


I laminated some plasticard, and with the original items held to the plasticard,trimmed the laminate to the originals. Out with the file to do leading edges and to profile the wings and tail assembly, and the engine air intake and the plane begins to take shape.


More to follow this week as I secure the various pieces to the fuselage of both planes.


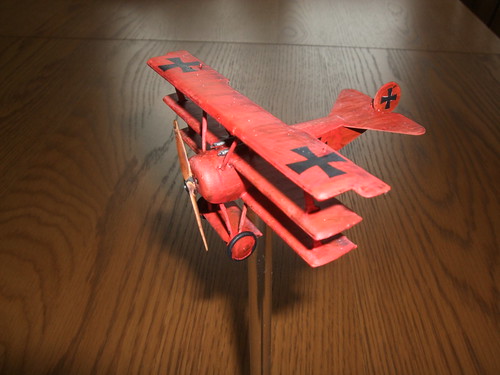
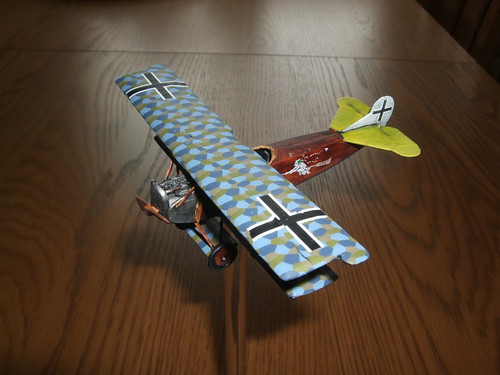
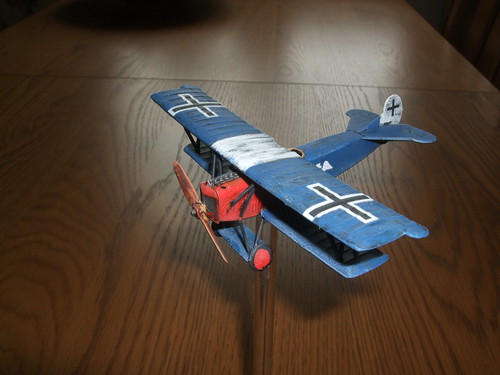
WW1 aircraft so far

After feeling rather fed-up with the lack of gaming going on, a combination of work, housework!! ( work in the house that needs doing ) and lack of time, pottering around the shed doing bits of work on the WW1 aircraft have got things going again.

I have managed to do 6 aircraft bought at Yeovilton several years ago. I have sorted out stands for the aircraft, and decided on how to do the game board. In fact it will be a sheet that I will hex out.

I have 2 Fokker Dr1's, 2 Fokker D7's and 2 Sopwith camels. I have ordered 2 Spad XIII's from Thailand of all places. They were so cheap and post free.


The stands are what I first built and used for my WW2 weird and normal  planes , but having finally sorted out the stands, to be able to use height I will be converting them to the new system - telescopic reach rods, with a magnet on, securing the planes via rare earth magnets under the planes. Post to follow.

Kit wise, the 2 Camels were from Academy, ok and easy to put together. The early D7 was from Roden. A complete bitch to assemble as the parts were all to scale and in proportion, as well as being super detailed. The decals were superb as well. Detail lost on a wargames table, but allowing me to be able to pimp up poorer kits with the leftovers. The later D7 was a Revell kit, simple and easy to do lacking detail and good decals. The Fokker triplanes were from Smer, not so good quality as Roden, but better than Academy and Revell.  
  

Wednesday, 24 July 2013

After action report - 11th Armoured in Operation Goodwood Kampfgruppe Normandy

Wow, I have managed to get back to the blog. Time and opportunity, along with something to write have actually got together in the same place. Sorry for the lack of pictures, but in the end it was a very grisly affair, especially for the Brits.

I had been thinking about trying to do Goodwood for quite a while. The only problem was a serious lack of Shermans, Firefly's and the complications that arise from incorporating infantry into a game. So, scrapeing together 21 Shermans, and using a losses become reinforcement system, the game was on. No infantry, only flank shot 88mm's, a few supply trucks, limited artillery support, aircraft, and a restricted german list.

The table was 8 foot deep by 6 foot wide, bare except for a 6 foot stretch of wood at one end. This was the German deployment area. The Brits could deploy within 2 foot of their table edge in any formation, except that when deployed as a regiment, they must keep their squadrons tanks integral but could have the squadrons spaced. The Brits deployed their regiments in line, and abreast. There were 12 tanks per regiment, with 4 squadrons, each squadron equipped with a Firefly. The Brits had a Battlegroup command, with a FAC and FOC. Artillery was 2 high prioirty requests.

The Germans had a Battlegroup command, 2 supply trucks and flank firing 88mm shots. There were 3 units available to the Germans, but they could only choose 2, at random. 2 Tigers, 2 King Tigers or 3 Panthers. The Panthers and the King Tigers were rolled for. Flank shot 88mm's were 2d6 of shots - 7 were rolled. Germans deployed by map after the Brits had deployed.
So with a notional 24 Shermans deployed - 8 17pdr's in the mix against 2 88mm L71's and 3 75mm L70's, the Brits were reinforced with an additional regiment. Ammo would be an issue for the Germans, hopefully, as airpower would become an issue for them as well.

The Brits moved up, hesitatingly to just outside extreme long range. The Germans sent in 3 flank shots, brewing a Sherman. This brought the rest of the regiment up into extreme long range, leaving the adjacent regiment outside 48 inches. The germans replied with fire from the King Tigers, and the smashing of the Brits began. As the second regiment moved up, they were then engaged by the Panthers. Before long, with the Germans firing 2 shots per tank at a Sherman, the Brits were down to 50% casualties for both regiments, and the 3rd regiment could be put on the table as reinforcements. Even with the 3 regiments giving a 56 morale value for the Brits, a King Tiger going down to a 75mm shot rolling a 12 and a 17pdr just catching a Panther out, the Brits had 16 morale value remaining. No aircraft had appeared or other chits except for hero.

 The Germans had resupplied their tanks during the exchanges, and the Brits had pushed a Sherman to within 16 inches of the remaining King Tiger, but all for nothing. With only one fail on penetration, all the Germans managed to brew a Sherman if they hit the tank. As a rule, with nearly all Sherman shots were needing 10 or more to penetrate unless it was a 12, the Brits were unable to make a hit count. They did get 2 tanks in the end.

With 2 regiments smashed - by the time the 3rd regiment could have moved into battle at 48 inches, there were no survivors of the first 2 regiments. I ruled that the Brigade would have been withdrawn, and it had gone past 10pm as well.

Fire and movement were the key to British success, and failure to combine this when moving the squadrons meant that  the Brits could expect a +2 on their to hit score when attacking concealed german tanks if they fired whilst moving. When they were stationary, the Germans were given 50% chance of a hit - 4 or more - with an auto ish kill when they hit. 2 was a failed penetration no matter what. The flank shots required a 6 to hit.

The German plan was to engage and then move to a different position and fire again. However, with the effectiveness of the guns, the problem was hitting, and as a consequence resupply of ammo. If in range, the Germans remained stationery and spent pips on firing, not moving. For targetting purposes, Firefly's could not be singled out, and then only if randomised in a multigun fire on multiple targets. Nearest tanks to the firer would be engaged first.

Overall a very good game, much closer than it sounds, with no clear advantage for the Germans. In fact I thought the advantage was with the Brits, in terms of numbers.


Sunday, 2 June 2013

Flames of War - US vs German, Mid War

With my gaming restricted to Fridays and weekends, an invite to a game on the evening of Friday 31st was very welcome after a long slog with work and other commitments. I'd also been plodding away at painting up my 1/72 scale WW1 aircraft and could do with a break. Johns kind invite supplied the needed diversion.

I'd rushed off to deepest Somerset without my camera, although Dave came with his, so all photo's are courtesy of Dave. Photo's are from his flickr account, the address as follows http://www.flickr.com/photos/guard44/. Well worth a visit.


The game was set in Mid War Sicily, 1750 pts of German ( myself and Dave) vs US (Gavin and Ian). John was moderator/umpire. I can't remember the book used for this, but if you know your FoW, you'll know which one. Game was played with all updates to rules.

US forces were as follows
Shermans x3
Shermans x3
Shermans x2 ( I.C and 2I.C.)

M21 1/2 track with 81mm mortar x3
M3 1/2 track with I.C.

105mm gun x4 (with tows)
Observers x2 (in jeeps)
I.C.

2 Armoured inf companies each of
M3 1/2tracks x4
M3 1/2 track with I.C. and 2I.C.
Infantry had 4 bazookas

Major Gen Harman ( character/hero ) in jeep

German forces were as follows

PzrIII with long 50mm x4
PzrIII with long 50mm with I.C.

Marder II with Pak40 x2

105 mm Field guns x4 (with 4 tows )
Staff command, I.C. and 2I.C. with 2 observers

75mm I.G x2 (no tows )
I.C. with oberver

Grenadier company with I.C. and 2I.C.
platoon of inf- 4 inf/lmg team with I.C. x3
platoon of 4 HMG's with I.C.


The scenario was rolled for, which was Defender/counterattack, having 2 objectives. The objectives were deployed individually by each side in the corner quarters of the table, one in the German deployment zone, the other along the table long edge by the US. The Germans would have to deploy their infantry and static troops on table in one of the corners, and their reserves would come on in the opposite corner. They would also have an ambush, but this would be within the deployment zone. It would have restrictions of being 16inches away from any US forces when revealed, but within the deployment zone. All German infantry, observers, staff and guns would be treated as dug in and gone to ground.
The US could deploy all their troops at the start of the game but in their deployment area. This though would be done after German deployment. They would also have first move. Here came my first mistake and misunderstanding of FoW. Fortunately I would not be spanked too hard for this, although it wouldn't stop me making another two. Ooops.


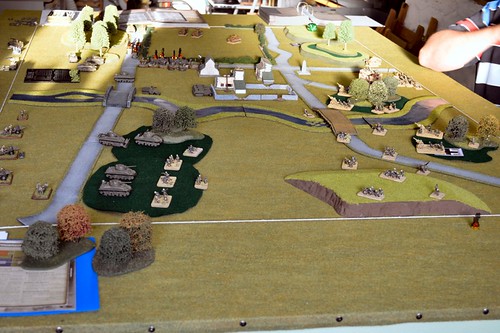
The terrain was laid by John as follows. There was a hill in the German deployment zone along side of a road that ran up to a village in the centre, connecting it with  several roads running through the centre of the table. A river ran through the centre along a wood from the German deployment up through the centre to the middle of the opposite long edge, with 2 bridges crossing it for the roads. On the right of the Germans was a long ridge with woods on where the US had placed their objective. Opposite this feature was a large wood along the other long edge. In the opposing corner of the Germans was another wood obscuring the US deployment area.

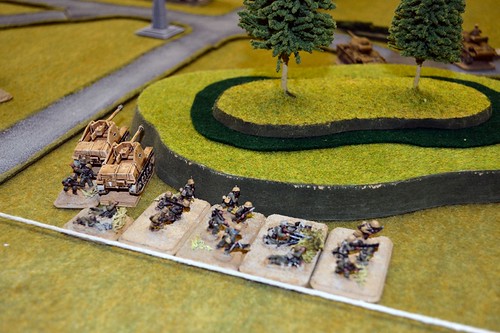
The Germans deployed the 2 infantry guns on the small hill, supported by 2 platoons of infantry. We had Kampfgrupped the HMG's  to make a 4th infantry platton, with the idea of sending 2 platoons across the table to secure the 2nd objective. The 105mm battery was deployed in the wood next to the river, and the 2 Marders were in ambush in the village. We also had an artillery observer in the village. The reserve was the PzrIII's.


The US deployed their 105mm battery behind the wood opposite the Germans, all their armoured Infantry along the road to race to the 2nd objective, with the mortars in the middle, and the Shermans split into 2 groups along the road, one of which was lurking at the corner of the wood to swing out and charge down the Germans to reach the objective and win. This was a quite solid deployment, and after a brief chat with Dave, thought that the game was going to be over roundabout move 2.


I had forgotten that the US moved 1st, and when deployed initially thought that the US had actually moved. But, when the 1/2 tracks in 2 groups proceeded to move 32 inches down the roads one lead by Major Gen Harman to secure the objective in the far corner I thought I'd really dropped a bollock! Ho hum, it's off to the Russian front for me, if we survive.The second mistake occured with the deployment of the 2 platoons to move to the second objective to secure this. I thought that I had put these out of sight, but had unfortunately left a base visible from the US deployment zone, if an artillery observer was carefully placed. Gavin, playing the US was able to deploy a carefully placed artillery observer. Possible a worse mistake than the first, but in combination a disastrous misunderstanding. The 2 platoons were pounded by the US 105mm battery, but pinning 1 platoon and killing 2 stands from the other.


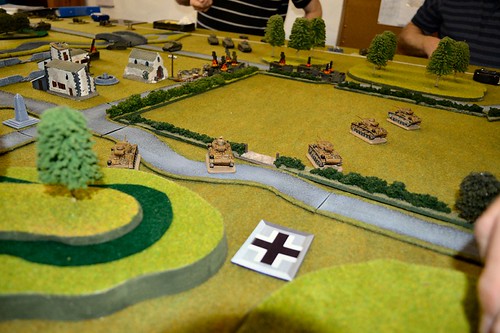
So, German turn and what to do. Suck it up and smile or so we thought. The first thing to do was to roll for the reserves. Over to Dave - I've never been able to roll for critical scores - Fowler. 5 required, and 5 rolled. Cue up 5 PzrIII's in front of the 2 armoured infantry companies strung out on the road. Also cue up howls of despair from the US - "there was always a chance that their reserves would come on ", but the situation from the German side still looked awful.

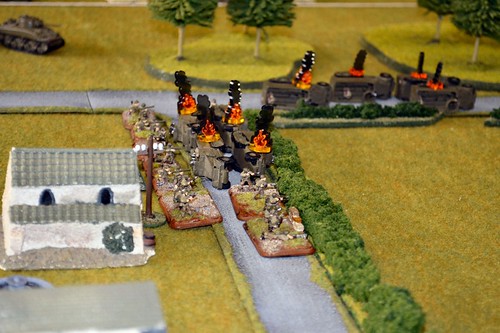
Next, a peculiarity of the FoW game system came into effect. I'd played the Beach assault game where my US infantry had been slaughtered by German HMG's when assaulting the Coastal Battery because they had doubled up to it and had exposed a stand to fire. All fire was doubled on them. The same now happened to the Armoured infantry, even though the rate of fire was reduced by the PzrIII's moving to coax machine gun range. The first company was wiped out destroying all bar one 1/2 track and 3 stands, the second company was hit by the German 105mm's, pinning them and doing 10 casualties, leaving 8 stands pinned. However, the US shelling of the 2 German platoons attempting to move to the other objective meant that the reduced platoon of 3 stands including a HMG, moved into a building for cover, and then opened up on that column, along with the 2 infantry guns on the German left directed by the observer in the village. Major Gen Harman took the brunt of the HMG fire when his jeep was caught. The remaining German platoon doubled up to race for the protection of the hill with the objective, but still visible.


The first move decided the outcome of the game, turning it from a fight against a mixed force of  US troops which the Germans would lose, to one where it was a fight against the Shemans, mortars and 105's. Would they survive to reach 16 inches of one of the objectives. The Germans could now move into the centre of the table to affect the game.

The following US turns were an attempt to unpin the Infantry, and shore up the centre, but the leaving the Germans exposed as they doubled to the objective. Really awful dice from the US 105's - in 2 turns they were unable to call in any artillery, and when they did damage was minimal to saving. The mortars were then pushed to the centre to pressure the Germans, but exposed the 1/2 tracks to fire from the German HMG's in the German line as well as the infantry guns.


Cue my 3rd mistake. I had a platoon protecting the infantry guns on the far left, and seeing the Shermans behind the wood, but within reach, moved the platoon into the woods. Infantry in a wood, protected from attack and threatening the US 105 battery, what could go wrong. Gavin turned the Shermans 90', rolled for bogging and got 3 of the 4 clear. Moving up to hammer the German platoon from my mistake. Surely noone would send tanks against infantry in a wood, I mean I've read loads of accounts where they wouldn't do it!! It's not fair! Well, German Panzer commanders wouldn't do it.
The possibility of the Shermans doing this had not entered my addled brain at all. My hubris complete, for the debacle in the centre with the US Armoured infantry.

The game proceeded with the US trying to bombard the German 105mm's in the wood, but being dug in and Confident Veterans meant that they survived but were slowly whittled down with the help of the M21 mortars in the centre, 1 per turn, till the 5th, with only 1 remaining. The Shermans being in 2 groups the one in the wood assaulted the exposed infantry ineffectually but forcing them back onto the hill where the 2 75mm infantry  guns were located . The other group of Shermans hide behind the side of the wood to engage the advancing PzrIII's, taking them down to 3 by the end of the game for no casualties, but not able to advance to the US laid objective behind the PzrIII's. Meanwhile, the German infantry guns and HMG's were bearing down on the M21 1/2 tracks located in the village edge. It wasn't until the 6th turn that the PzrIII's were able to advance sufficiently to engage them and the Shermans, and put main gun fire into them.


As the US had 6 command groups, 4 losses  were needed to defeat them regardless of the victory conditions, and from move 3 they were on 2, as the Shermans were out of range, and the 105mm's hidden, but the mortars were exposed. It all came down to the 6th turn, for the US and German. The US pushed their Shermans forward and routed the infantry guns, and the remains of the infantry platoon after they had blown up a Sherman with their Panzerknacker attack. The only defence now was the infantry platoon between the hill and wood across the road protecting the objective - 4 stands of infantry. The I.C. moved to command the platoon - rerolls, and lead the attack against the sole remaining Sherman, which was within 16 inches of the objective. With direct fire from the 105mm's in the wood no longer possible - the unit had broke, it was down to a die role contest. Unable to pin the Germans - to get 5 hits, the attack went in, and the Sherman went up in flames. Game over on move 6, no US within 16inches of any objective, the US mortar 1/2 tracks failing morale - the IC and 2 1/2 tracks destoyed, the Shermans failing their morale, as they still had a dozer equipped tank bogged down the other side of the wood, and the 2 Armoured infantry companies had been routed.


Success, and Iron Crosses all round. Of course that would be for the survivors - the I.C., 2I.C., 2 platoons of infantry, 2 Marders and 3 PzrIII's. I thoroughly enjoyed the game, the company and the result! Thankyou's to John, and Dot for the Panini. 


Sunday, 5 May 2013

Maczuga - The Mace - 19th/20th August 1944 - 1st Polish Armoured Pt1


Having read a lot of the background to Falaise, and the 'escape' of the German forces through the 'gap', I thought that it would be interesting to try to explore this further. Given my US bias, I thought that hanging around for several days with a US combat command would not make an interesting game. Likewise, roleplaying a French unit to see when it shot of in the direction of Paris - to liberate, would be equally boring. The grinding hard battle that was the closure of the Falaise Gap, was fought by the Polish, and to a certain extent the Canadians against desperate fanatical SS units - mainly 12th SS, and 1st SS Panzer Corps, holding the 'neck' of the noose.


Okay, apologies to the US, French and Brits, but the commitment of the Poles forced a tactical reaction by the Germans to commit elite forces - the SS to hold open the northern edge of the 'Gap', risking trapping those forces whilst allowing frontline German units to retire. The core of the support units/staff were mostly through when the battle reached its hiatus but not all. Lack of command coordination, ego's and strategic and tactical ineptitude almost made the sacrifice made by the Poles irrelevant. My game would include aircraft, though targeting would be random - the Poles would be equally liable to be rocketed as would the Germans.
 
The Germans would be deployed randomly along the escape route, which they would need to exit off the table via a ford over a small river. The Germans would get victory points for units able to escape - they would be able to make the Polish player take a damage chit, or give them one of their own damage chits caused by the Poles destroying German units. The Poles would deploy on one side of the table in any formation they wished, but before the random deployment of the Germans. This would show the unexpected revealing of the German column, but the Poles would move first.


The Germans deployed alomg the entire length of the road, up to the ford. A battlegroup command and a pair of Panthers deployed off the road as there was no room on the road. There were 2 platoons of marching infantry, 2 Marders, 2 towed Paks - an 88mm and a 75mm, 2 lorry towed 105mm howitzers and various cars.
 

The Poles deployed on a hill rise - a troop of Shermans with a Firefly, and 2 armoured forward observers - an Air and Artillery observer, in an unarmed Sherman. 2 platoons of infantry, both sweeping along the river. The Poles were deployed with their tanks effectively away from the Panthers, but within sight of a pair of Marders.
 
 
The observers were out on the right flank, not really able to observe that much, witht the Firefly next to them. This opened up the possibility of the Panthers taking out some of the Shermans and the Shermans/Firefly taking out the Marders. By the end of the first move,this is what had happened. However, the Polish infantry were exposed in the open to the Panthers, and then had to be relocated away from them, behind the hills and tank line or what remained of it. 
 
 
The Poles managed to seal the front of the column, but as stated earlier took casualties.

 
The Marders were quickly dispatched by the Firefly.
 
 
 The German infantry are making a run for the ford behind cover, but a Panther succombed to a lucky shot from a Sherman. A towing 1/2 track for the 88mm got blown up, but managed to deploy before losing the tow. This though blocked the road for the rest of the column, forcing it off road to avoid. There were no recovery vehicles - must get hold of a Famo recovery track, or make one.


A look at the tradeoff so far, and the response of the Poles to the German resistance.


One of the howitzers deployed to have a go at the Sherman equipped observers. Though they didn't have a main gun, they had bow mounted mg's. Enough to suppress parts of the column and the gun.
 

The Germans are pushing infantry across the ford, and the 1/2 track is moving up, followed by a lorry. The remaining Panther is going on the attack, forcing the Poles away from the ford and into the farm complex.
 
 
All that remains of the troop of tanks is a Sherman hiding behind the barn trying for a side shot of the Panther.


The Panther having scared off the main attack on the column, heads for the ford and to engage Polish infantry moving up to outflank the column and seize the ford. The Panther opens up with the mg's on the infantry creating mayhem.

 
The observers, reinforced by a section of infantry move up on the end of the column

 
The Poles on the left have suffered a setback, and in the middle wait behind the hills. All told it is not a German victory, but a Polish loss, in that the column has forced its way across and the Poles can't stop it. Thanks to John ( Germans ) and Ian ( Poles ).
 
Part 2 will be the attack on the Poles at the Mace - the Maczuga ( in Polish ). The Poles will be in defensize positions against an assorted German force determined to remove them from across their line of retreat. 


Monday, 15 April 2013

Dystopian Wars Taster - Game 12-04-13

I'd heard a lot about this game, and after looking up the game on the web - just type in Dystopian Wars in images, wanted to see it firsthand.
French naval group
 
Blazing Sun naval group
 
I have always had a passion for naval, especially WW1 and Ironclad, as well as an inclination to Steampunk. It seemed totally insane that the two should come together, or not...
Prussian naval group
 
FSA naval group
 
The game was of 4 navies - Empire of the Blazing Sun (Japanese), Federated States of America (US), Prussian Empire (German) and Republique of France (French). The French have the sexiest looking vessels - totally steampunk predreadnoughts. The US have hi-tech paddlewheelers, the Germans have US WW2 style kickass vessels, and the Japanese have vessels inspired by Casey Jones - comedy train style ships that are totally awesome rocket firing platforms. They also have a giant mechanical squid as well. They are the one for me, roll on the Nautilus and captain Nemo.

The models all came from the basic starter fleet sets, with a few extra's, which is where the extra bit of the game comes in. The stat cards and other bits for the ships are all downloadable, though the rules are a must. The game lasts 6 turns, and to be honest that is more than enough to get a result.

The game was a general shoot-em-up, last man standing. The game works with iniative rolls to determine who goes first, then alternate groups/squadrons with your opponent.
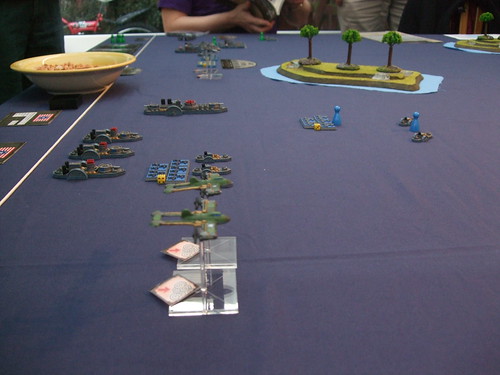
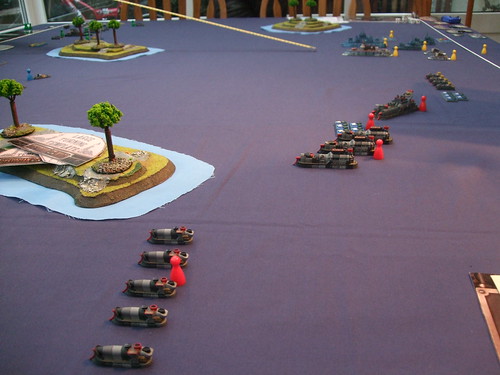
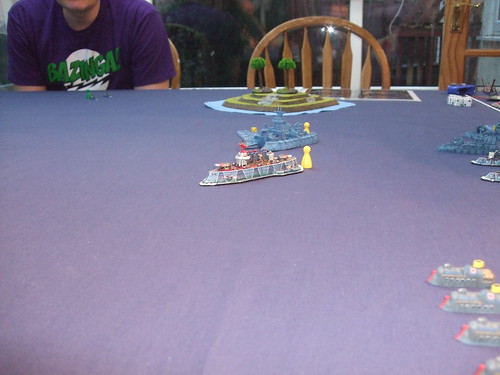
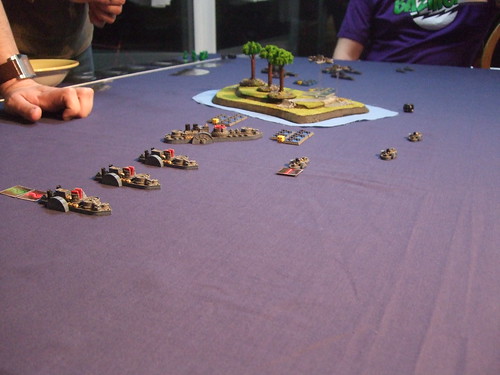
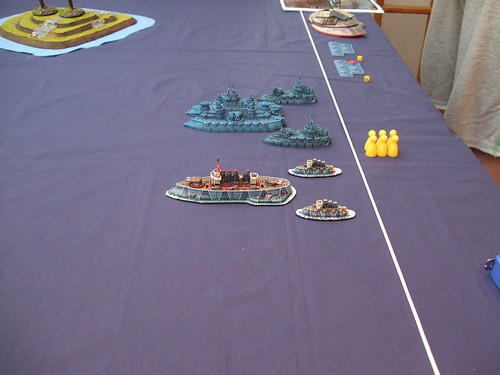
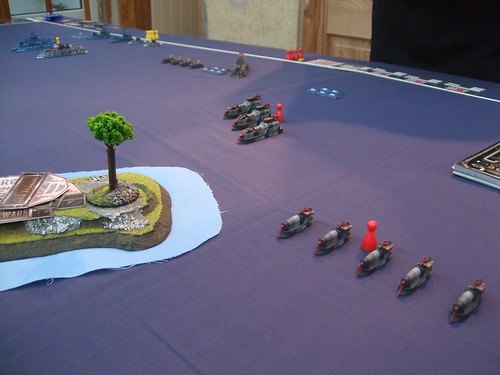
The French and Blazing Sun moving up. The Empire of the Blazing Sun are nearest. To aid the game, markers have been placed with groups that have been activated in the turn sequence.
The FSA moving up to engage the Blazing Sun.
 
The RoF battleship, supported by a dreadnought moving across to engage the FSA vessels

A better view of the Blazing Sun fleet.
 
The FSA fleet taking damage. Mainly from rocket attacks from the Blazing Sun, which can fire an insane amount of rockets when grouped up. It also shows the island which effectively split the Prussians from the FSA, and their mutual support.

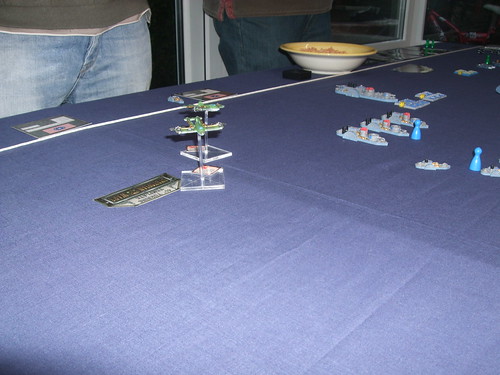
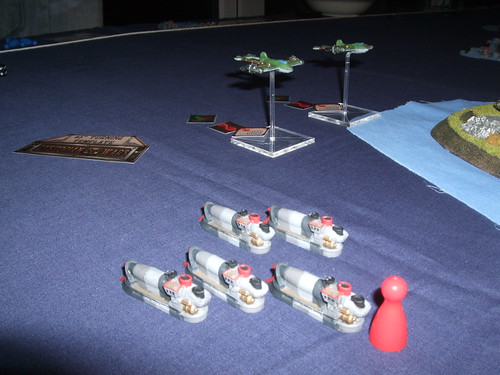
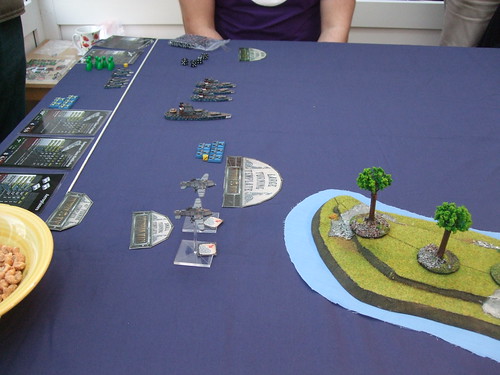
The FSA aircraft forming for an attack on the Blazing Sun, but with the ships manoeverability, this was next to impossible giving the activation sequence and the ability of the aircraft to react to it.

Well, as an observer to the game, I could leave early, and unfortunately that is what I had to do. The game looked very good, with lots of potential for painting and modelling - vessels and terrain. Some of the stuff on the web is truly awesome, and a great advert for the game. Here is one.

http://www.hamburger-tactica.de/tactica/img/fotos_2012/dystopian_wars/dystopianwars_02.jpg