Finally getting going with Battlegroup Overlord, where time and opportunity have finally come together. A big game was set up by Nick T- and in 6mm, with a 14 ft by 6 ft table to play on! A British Yeomanry Regiment would push on from one short side down the table to the other. 21st Panzer would delay and reinforcements permitting counterattack to stop the push forward. There would be no aircraft in the game.


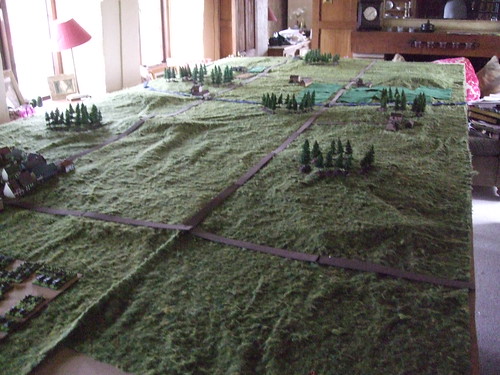
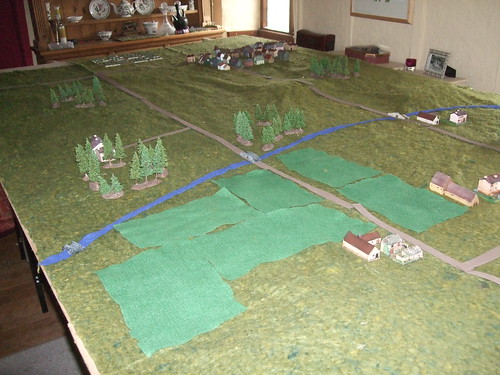
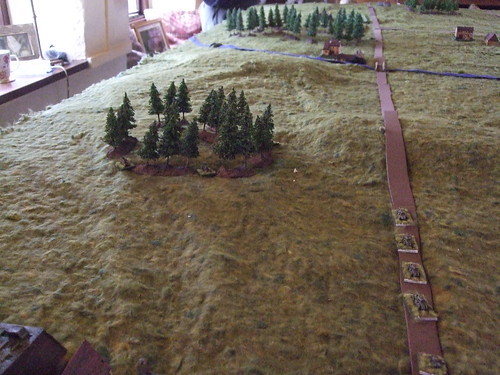
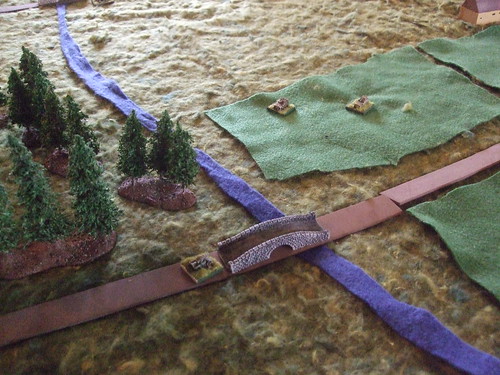
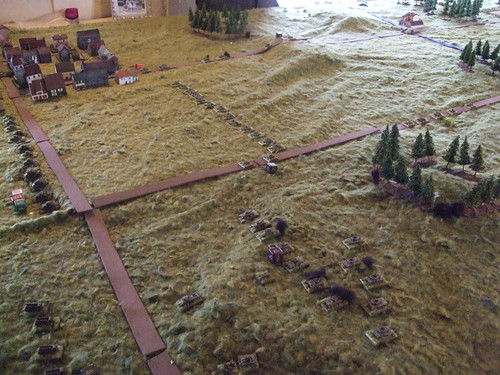
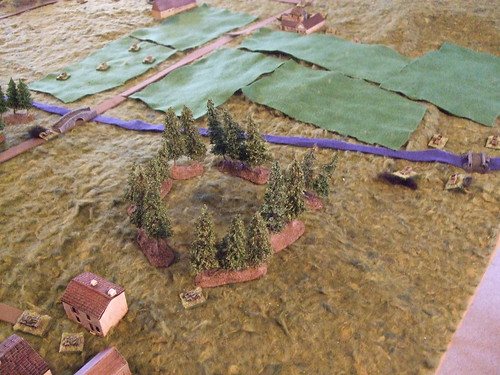
There were 2 main road systems down the table, various villages, woods and hills dominating them, as well as a river with 4 bridges over it to negotiate. The first problem would be to work out how to set up the advance with the forces involved and avoid a gigantic traffic jam.


The British forces were as follows
Senior Officer - Regimental command
Yeomanry regiment of 3 squadrons
2 troops of Divisional Armoured Recce
2 troops of wheeled Recce
1 troop of Achilles
1 troop of towed 17pdr's
1 troop of Churchill's
2 platoons of Armoured infantry
1 platoon of lorry borne infantry
5 artillery observers
2 Sherman flails
2 batteries of 5.5 guns
2 batteries of sexton's
3 pre registered targets
The 21st Panzer had the following that I know about! As we played hidden German movement, I know that there were 2 companies of Piv's, 2 Armoured recce troops, 2 Pak43 88mm's, 2 troops of spg A/T - one of 47mm and the other with 75mm, a troop of 105mm spg's, and a 1/2 track mounted rocket battery. I have a photo, but was really concentrating on other things. These were units that either opened up at me or were spotted when moving.

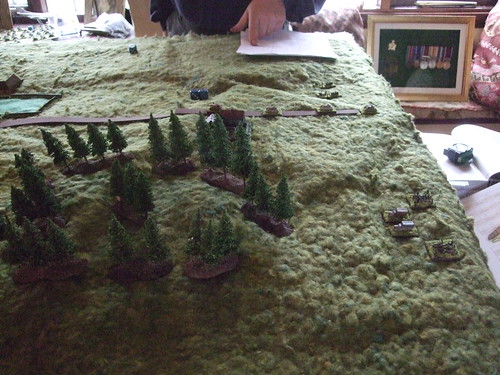
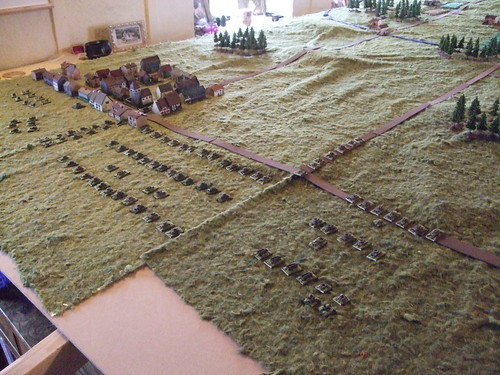
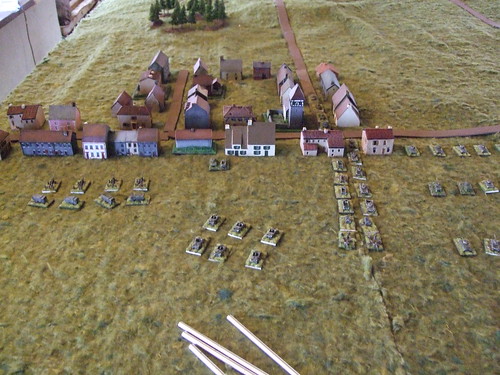
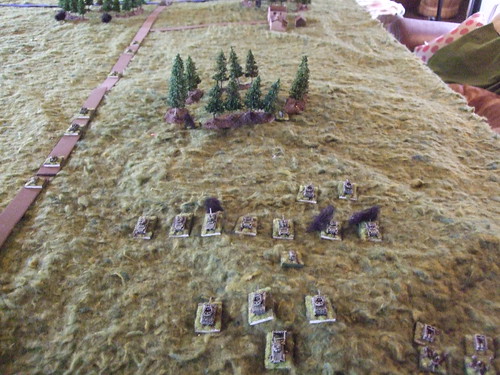
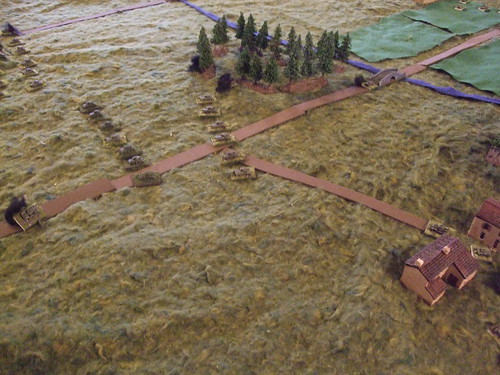
The plan for the advance was for a troop of the wheeled recce to proceed down each road to draw out the fire and spot. The main advance would be by the Yeomanry not on the road, but between the roads, with a wood directly to the front, the bridges over the river either side. Each bridge was covered by on the left, a wood and village the other side of the river, and the same again on the right but this side of the river. Advancing between the roads allowed the yeomanry, supported by a platoon of infantry, to be deployed by Squadron to best effect. The advance up the left hand road would be handled by the Churchills and a platoon of Armoured infantry. The right hand road would host the A/T troops and the Divisional Armoured Recce, supported by the lorry borne infantry. To be honest, the plan was looking a bit thin after having taken the bridges ( if I did manage to). The advance would be tricky to handle and control, possibly slowing the game by being over cautious ( curse of the god like wargamer ), and I might always be reacting to events/ambush. The idea was to pressurize as many bridges as possible and overwhelm the German defences, to force a passage, supported by the artillery.

Having deployed, off went the wheeled recce, and 3 barrages of art on the pre designated targets. The Armoured recce moved off as well. I sent art observers up with them. Having high 20's with the dice it seemed that I could do whatever I wanted. The problem with handling this size formation was that there were too many things to do. I believe the key is to set up discreet actions that can be fought or conducted that you are able to control. The second part is to set up covering fire for any movement. Even if you are reacting, at least you can react with the cover force, whilst spotting and moving. Apart from a query over the first art barrage - we were able to manage less than 10 mins a turn, playing for approx 3 hours, 4 counting tea breaks. I had 4 very large mugs of tea. You can't play British any other way.
I remember having read Ken Touts books on Normandy years ago, and his thoughts and impressions of his regiment forming up for the attack. They are deeply personal accounts of the period of Normandy and the campaign on to the end of the war. They catch and sum up the the essence of what it was like. Back to the game...

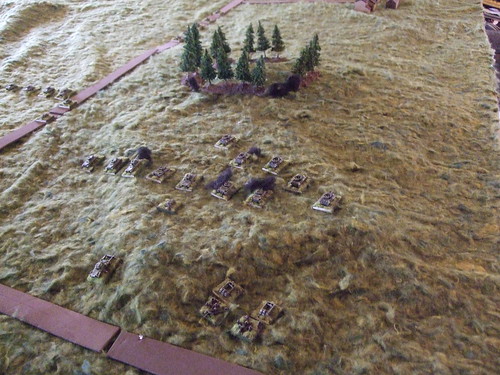
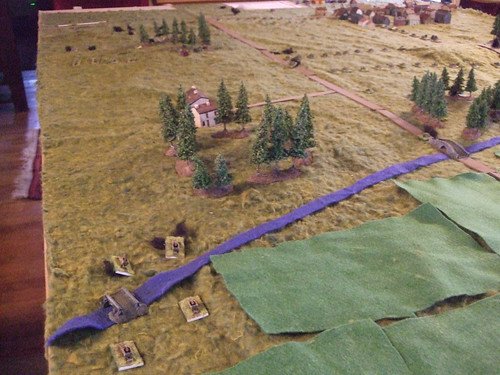
 The recce was able to draw out the spg mounted A/T of the Germans our side of the river. They were hiding in the woods, and casualties started to mount, especially with the Armoured recce. The Churchills were moved up on the left, and the Achilles brought forward to support the Cromwells on the right.


One of the aspects of the game, that Nick brought to it, was the lack of suicidal units taking advantage of the crafty shot. When German units were threatened or about to be overwhelmed, they withdrew back to harden up the defences further back. There was no point to throwing them away to degrade the advancing Brits. This was actually more frustrating - and more real/better - as I did not necessarily see these units, couldn't do anything about them as I had enough to deal with in front of me, and/or didn't have the command effect on the table with the dice to do anything anyway.


The depth of the game, and its scale helped to do this much better than in 20mm. We also kept the measurements in 20mm scale, but were operating in 6mm. This seemed to work very well as well.


Hitting for shooting seemed to bring up a peculiarity, which was that so long as the range was 30 inches or more and the target was moving, you needed a 6 to hit, if you moved as well, then the range had to be 20 inches to 30 inches. This allowed the Shermans to use their numerical superiority. Manoevring at this point, with each squadron supporting the other with move and covering fire allowed them to advance up and eliminate ambushes as they were sprung. Again, I think this was an effect of the table size, and not something that would come up in 20mm games as the ability to do this would be limited by board size - 6 ft by 4 ft deep.

In fact, large games using Battlegroup, on large tables seem to work very well, far better than 20mm. If the opportunity comes up to try a game in 6mm, then it should be taken.

The wheeled recce did their thing as well. Some of the problems with controlling the British, I am sure, were the same for the Germans. There were too many things to do, such as bringing up reinforcements. Also, opening fire onto the pesky armoured cars was an easy shot/kill, but revealing positions to the advancing forces. The ideal role and function of the recce forces. Playing games in 20mm, tend not to allow you to do this. Its straight into combat move one, you're being shot at, or avoiding being shot. Perhaps the size and balance of forces may be the reason for this, as well as terrain. Sorry if this sounds like a eulogy for 6mm.

Artillery I thought might be dominant in the game, but the investment in command dice was just too great to keep up with the events happening on the table. Especially after the first round - I failed the next 3 turns of artillery requests, never getting past the radio check. Nick used a single barrage from the halftrack mounted rockets of 21st Panzer. I had some of my observers forward, one with the Armoured recce, and in both groups of armoured cars. We didn't have artillery off table, but used on table artillery. For the British, 4 5'5 tubes and 6 25 pdr tubes was a quite substantial supporting force. Direct HE fire, which a battery of 105mm spg's of the Germans did, seemed better use of the guns than in indirect fire.


I think that the problem with the artillery was the quantity, and the type of artillery support requested. The priority calls are the best method of getting support, and the most flexible and cheapest off table support are the mortars. The fact that unit commanders can call for support as well as your artillery observers is a cost bonus as well when constructing a battlegroup for the table. Communication bonuses are a must - dispatch riders, wire teams, radio vans and being US, for help with the dice rolls!
Thanks to Nick for the invite and great game.


One of the aspects of the game, that Nick brought to it, was the lack of suicidal units taking advantage of the crafty shot. When German units were threatened or about to be overwhelmed, they withdrew back to harden up the defences further back. There was no point to throwing them away to degrade the advancing Brits. This was actually more frustrating - and more real/better - as I did not necessarily see these units, couldn't do anything about them as I had enough to deal with in front of me, and/or didn't have the command effect on the table with the dice to do anything anyway.

The depth of the game, and its scale helped to do this much better than in 20mm. We also kept the measurements in 20mm scale, but were operating in 6mm. This seemed to work very well as well.
Hitting for shooting seemed to bring up a peculiarity, which was that so long as the range was 30 inches or more and the target was moving, you needed a 6 to hit, if you moved as well, then the range had to be 20 inches to 30 inches. This allowed the Shermans to use their numerical superiority. Manoevring at this point, with each squadron supporting the other with move and covering fire allowed them to advance up and eliminate ambushes as they were sprung. Again, I think this was an effect of the table size, and not something that would come up in 20mm games as the ability to do this would be limited by board size - 6 ft by 4 ft deep.
In fact, large games using Battlegroup, on large tables seem to work very well, far better than 20mm. If the opportunity comes up to try a game in 6mm, then it should be taken.
The wheeled recce did their thing as well. Some of the problems with controlling the British, I am sure, were the same for the Germans. There were too many things to do, such as bringing up reinforcements. Also, opening fire onto the pesky armoured cars was an easy shot/kill, but revealing positions to the advancing forces. The ideal role and function of the recce forces. Playing games in 20mm, tend not to allow you to do this. Its straight into combat move one, you're being shot at, or avoiding being shot. Perhaps the size and balance of forces may be the reason for this, as well as terrain. Sorry if this sounds like a eulogy for 6mm.

Artillery I thought might be dominant in the game, but the investment in command dice was just too great to keep up with the events happening on the table. Especially after the first round - I failed the next 3 turns of artillery requests, never getting past the radio check. Nick used a single barrage from the halftrack mounted rockets of 21st Panzer. I had some of my observers forward, one with the Armoured recce, and in both groups of armoured cars. We didn't have artillery off table, but used on table artillery. For the British, 4 5'5 tubes and 6 25 pdr tubes was a quite substantial supporting force. Direct HE fire, which a battery of 105mm spg's of the Germans did, seemed better use of the guns than in indirect fire.

I think that the problem with the artillery was the quantity, and the type of artillery support requested. The priority calls are the best method of getting support, and the most flexible and cheapest off table support are the mortars. The fact that unit commanders can call for support as well as your artillery observers is a cost bonus as well when constructing a battlegroup for the table. Communication bonuses are a must - dispatch riders, wire teams, radio vans and being US, for help with the dice rolls!
Thanks to Nick for the invite and great game.
No comments:
Post a Comment